Party wall extensions in England & Wales: serve notices 1–2 months
Most rear and side extensions in England and Wales commonly trigger the Party Wall etc. Act 1996, whether you are building on the boundary, excavating new foundations, or cutting into a shared wall. You must serve notice at least two months before party structure works, or at least one month before excavation and line of junction works. Check distances under Section 6 first, or speak to a party wall surveyor before you finalise your drawings.
TL;DR:
- Most extensions, especially on Victorian terraces, require notice if excavations go within 3 meters of neighboring foundations or if the work intersects a 45-degree line from existing footings.
- One month’s notice is generally needed for new boundary walls or excavation works, while works affecting shared structures require at least two months’ notice.
- A dissent from a neighbor triggers a surveyor process, resulting in a legally binding award that defines work scope, rights, and costs, which must be followed before starting work.
- Costs for party wall awards typically run into the low thousands in London, and delays often occur if foundation depths are estimated rather than confirmed.
- Proper planning, early communication, accurate drawings, and professional advice help prevent delays and disputes during party wall projects.
Table of Contents
- Does the Party Wall Act apply to your extension?
- What notices do you need to serve, and when?
- Section 6 excavation thresholds explained
- What happens if a neighbour dissents to the works?
- How much does a party wall matter cost, and how long does it take?
- How to avoid a party wall dispute before it starts
- What does a party wall surveyor actually do?
- Resolving disputes when parties cannot agree
- Does a party wall Award affect future changes to your property?
- Common party wall problems on real extensions
- Do you need extra insurance during party wall works?
- Publisher perspective: what site experience teaches about party wall extensions
- Party wall support from contractors
- Sources
Does the Party Wall Act apply to your extension?
The Act covers three distinct situations, and most homeowners only know about one of them. That gap causes more disputes than any other single misunderstanding on domestic extension projects.
A party wall is a wall that stands astride the boundary between two properties, shared structurally by both. A party fence wall is a freestanding masonry wall (not a fence panel) that sits on the boundary line, dividing two gardens or yards. A party structure is a broader term covering party walls, floor partitions between flats, and other shared elements. The line of junction is simply the boundary itself, relevant when you plan to build a new wall astride or up to it, even if no existing structure sits there yet.
For semi-detached and terraced homes especially, party wall extensions almost always touch one of these categories, because the shared wall between neighbours runs straight through the footprint most people want to extend.
Work that typically triggers the Act includes:
- Building a new wall on or astride the boundary line
- Cutting into a party wall to insert a beam, damp-proof course, or flashing
- Excavating within the statutory distances of a neighbour’s foundations (covered under Section 6)
- Underpinning or thickening an existing party wall
- Raising or rebuilding a shared boundary wall
Loft conversions, single-storey rear extensions on terraces, and wraparound side returns are the projects that catch homeowners out most often, because the excavation for new foundations frequently sits closer to next door’s footings than people assume. Practitioner guidance repeatedly flags this as the most overlooked trigger: people fixate on shared walls and forget that digging entirely on their own land can still be notifiable if it comes close enough to a neighbour’s foundations.
If you are unsure whether your extension for a semi-detached home crosses one of these thresholds, treat it as notifiable and get a professional opinion early. The cost of checking is trivial next to the cost of an injunction halting your build.
What notices do you need to serve, and when?
Serving the wrong notice, or serving it late, is one of the commonest procedural errors on party wall extensions. Three distinct notice types exist, each tied to a specific kind of work and a specific deadline.
- Party structure notice. Required for any work directly affecting a shared wall, floor, or structure, such as cutting in beams or raising a party wall. Serve this at least two months before work starts, as required under the Party Wall etc. Act 1996.
- Line of junction notice. Required when you plan to build a new wall up to or astride the boundary, even where nothing currently stands there. Serve this at least one month before work starts.
- Adjacent excavation notice. Required when foundations, trenches, or piling fall within the Section 6 thresholds. Serve this at least one month before work starts.
Once served, your neighbour has 14 days to respond. Three outcomes follow: written consent (letting work proceed as planned), dissent (triggering the surveyor process below), or a counter-notice, where the neighbour requests their own works be carried out at the same time. Silence after 14 days is treated as dissent, not consent, so a non-response does not let you proceed. That single detail catches out more homeowners than any other part of the party wall agreement process.
Section 6 excavation thresholds explained
Excavation, not wall-cutting, is the most misunderstood trigger under the Act. Two separate distance tests decide whether your dig needs notice, and both apply to work entirely on your own land.
The 3-metre rule: if you excavate within 3 metres of a neighbouring building or structure, and your new foundations will go deeper than theirs, notice is required. This catches most rear extensions on Victorian terraces, where original footings sit shallow by modern standards.
The 6-metre/45° rule: if you excavate within 6 metres of a neighbouring structure, and the work would cut a line drawn at 45 degrees downward from the base of the neighbour’s foundations, notice is still required, even at that greater distance. Section 6 of the Act sets out both thresholds precisely, and they apply regardless of whose land the digging happens on.
Practical examples for extensions:
- A rear extension with strip foundations 1.2 metres from next door’s wall, dug deeper than their footings, falls under the 3-metre rule.
- A side return excavation 5 metres from the boundary, on sloping ground where the 45° plane from the neighbour’s foundation base intersects your dig, falls under the 6-metre rule even though it feels comfortably distant.
An excavation notice must be accompanied by plans and sections showing the site layout and proposed depths, not just a description. Surveyors and structural engineers use these drawings to confirm whether either threshold is actually met, and disputes often start when drawings are vague or missing entirely.
Pro Tip: Get a structural engineer to confirm foundation depths on both sides of the boundary before you draft your notice. Guessing depths on older properties is the single biggest cause of rejected or challenged notices.
What happens if a neighbour dissents to the works?
Dissent is not a dead end, it is simply the point where surveyors take over. Some party wall notices meet resistance, and the Act provides a structured process for this.
Once a neighbour dissents (or fails to respond within 14 days), you have two appointment routes. Either both parties agree on a single Agreed Surveyor to act impartially for everyone, or each party appoints their own surveyor, who then jointly select a third surveyor as a fallback if the two cannot agree. Despite being appointed by one side, every surveyor under the Act has a legal duty to act impartially, not as an advocate for whoever pays their fee.
The surveyor(s) then produce a Party Wall Award, a legally binding document that typically covers:
- The precise scope of permitted works and working methods
- Rights of access for surveyors and, sometimes, contractors, onto neighbouring land
- A schedule of condition, a photographic and written record of the neighbour’s property before work starts, protecting both sides from unfair damage claims later
- How costs are allocated between the parties
- Any additional protective measures, such as monitoring for movement during excavation
Either party can appeal an Award to the county court within 14 days of it being served, though appeals are relatively rare given the cost and delay involved. Once finalised and unappealed, the Award is binding, and work can proceed lawfully. Skipping this step and starting anyway leaves you exposed to injunctions and common-law claims for damage, as surveyor commentary on excavation disputes makes clear.
How much does a party wall matter cost, and how long does it take?
Building owners pay the reasonable costs of the party wall process, including their own surveyor’s fees and, in most cases, the adjoining owner’s surveyor too. That is the standard position under the Act, and it surprises homeowners who assume costs get split.
Market commentary suggests Section 6 Award fees commonly run into the low thousands per neighbour in London, with regional variation elsewhere in England and Wales usually landing somewhat lower. Costs climb sharply where a project needs trial pits to verify foundation depths, ongoing movement monitoring during excavation, underpinning, or where you have multiple adjoining owners, each entitled to their own surveyor. A terrace with owners on both sides can effectively double your party wall surveyor fees compared with a detached plot with one boundary at issue.
Timescales follow the notice periods: budget at least two months from serving notice to starting party structure works, and expect the surveyor and Award process to add several more weeks if a neighbour dissents. Building this into your programme early avoids the scramble that follows a late-discovered party wall issue, and our foundations cost guide for Cambridge extensions gives a useful sense of regional groundworks pricing to sit alongside your party wall budget.
How to avoid a party wall dispute before it starts
A little preparation removes most of the friction that turns a straightforward extension into a drawn-out dispute.
- Confirm early whether your works fall under the Act, using the definitions and Section 6 thresholds above.
- Commission clear drawings showing foundation depths, excavation extent, and distances to the boundary.
- Talk to your neighbours before any formal notice lands on their doormat. A conversation over the fence defuses far more disputes than any legal document.
- Offer a schedule of condition voluntarily, it protects you as much as them.
- Instruct a party wall surveyor early if the project involves excavation near shared foundations or work to a party wall itself.
- Include proposed working hours and access requests with your notice, not as an afterthought once work starts.
Pro Tip: Agree site access windows with your neighbour in writing before your contractor arrives on site. Verbal arrangements about ladders, scaffolding, or monitoring equipment on their land are the most common source of mid-project friction.
What does a party wall surveyor actually do?
A party wall surveyor’s job is narrower than most homeowners expect, and that is by design. Their role is to implement the Act fairly, not to advise you on extension design, planning strategy, or general building disputes.
Core responsibilities include assessing whether the proposed works genuinely fall within the Act, preparing or reviewing the schedule of condition, drafting the Party Wall Award with its access rights and cost allocations, and, where excavation is involved, sometimes overseeing monitoring during the works themselves. Where two surveyors are appointed, one for each side, they are expected to communicate directly and resolve most points between themselves, only referring a genuine impasse to the third surveyor.
Crucially, a surveyor appointed by the building owner does not act as that owner’s advocate. RICS professional standards are explicit that every appointed surveyor owes an impartial duty under the Act, regardless of who pays the fee. This surprises homeowners who expect their surveyor to fight their corner the way a solicitor might. It is also precisely why the system generally works: an Award produced by two impartial professionals carries far more weight, and far less risk of later challenge, than one produced by an advocate.
Resolving disputes when parties cannot agree
Most party wall disagreements never reach genuine deadlock, but a small number do, usually where one neighbour disputes the schedule of condition, objects to special foundations encroaching underground, or challenges the proposed working methods outright.
The Act’s own mechanism is the third surveyor referral: where the two appointed surveyors cannot agree on a point within the Award, either can refer the specific matter to the third surveyor for a binding decision. This sits apart from general mediation or arbitration and is usually faster, because the third surveyor is already named and briefed on the project.
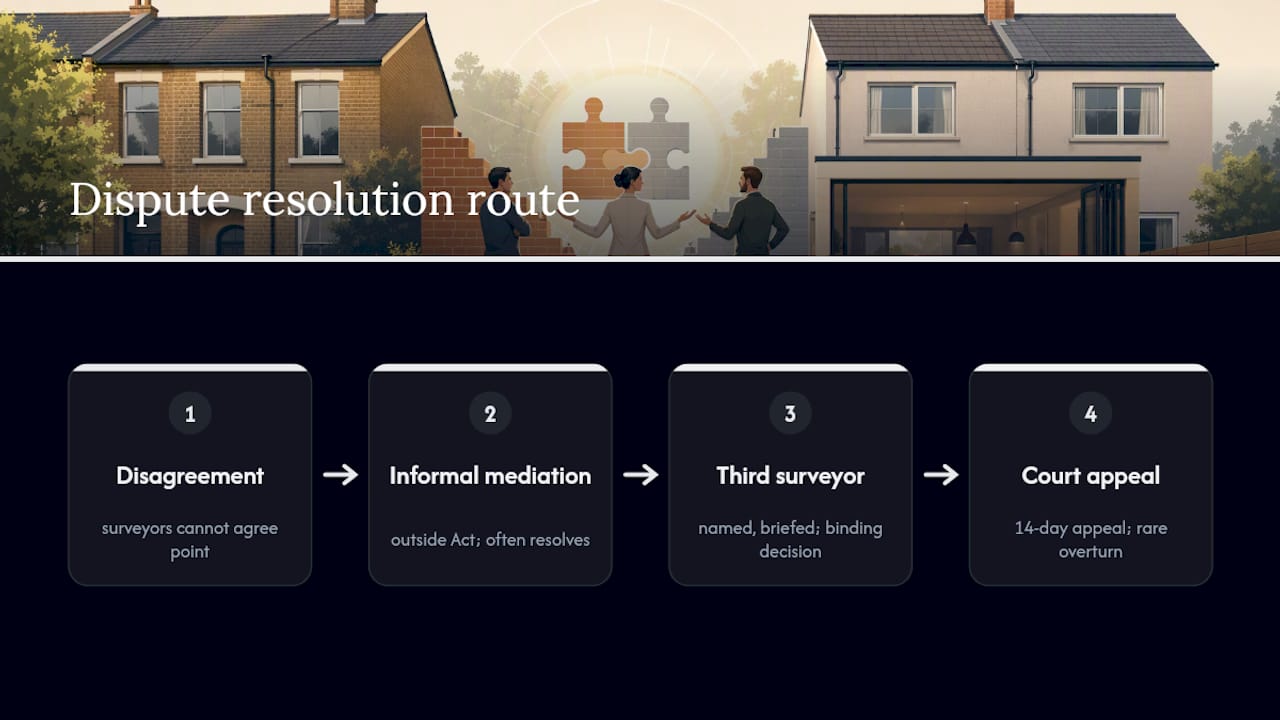
Outside the Act’s formal process, informal mediation sometimes helps where the dispute is more about tone or trust than technical detail, particularly between neighbours who will be living next to each other for years afterwards. A short mediated conversation, sometimes facilitated by the surveyors themselves, often resolves friction that a purely legal exchange of letters would inflame.
Genuine arbitration outside the Award process is rare on domestic extensions, since the third surveyor mechanism already provides a binding route. Court involvement is limited mainly to appeals against an Award, lodged within 14 days, and even then, courts are generally reluctant to overturn a properly reasoned Award unless there is a clear procedural or legal flaw. For homeowners, the practical lesson is that the Act’s built-in escalation route almost always resolves the standoff faster than pursuing it independently.
Does a party wall Award affect future changes to your property?
An Award is not a one-off document you file and forget. It creates a factual and legal record that follows the property, sometimes for decades.
The schedule of condition compiled during your project becomes the reference point for any future dispute about damage, so keep a copy indefinitely, not just until practical completion. If you later sell the property, prospective buyers’ solicitors will often ask whether party wall notices were served and Awards obtained for any structural work, and gaps in that paperwork can slow a sale or prompt price renegotiation.
Awards can also constrain what happens next. If your Award granted specific access rights or set particular working methods for one phase of work, a future extension or loft conversion touching the same party structure will usually need its own fresh notice and, often, its own Award, rather than relying on the old one. Special foundations that project under a neighbour’s land, permitted under one Award, do not automatically extend permission for further encroachment later. Keep your original notices, drawings, and Award documents with your property paperwork. They are as relevant to future building regulations compliance and resale as your original planning consent.
Common party wall problems on real extensions
Certain issues recur so often on extension projects that recognising the pattern early saves weeks of delay.
Underestimated foundation depth is the most frequent culprit: older properties, particularly Victorian and Edwardian terraces, often have shallower footings than modern calculations assume, pulling a dig within the 3-metre rule when the homeowner expected it to sit outside Section 6 entirely. Encroaching special foundations cause similar friction, where a beam or foundation is designed to project slightly under the neighbour’s land for structural reasons, something RICS notes requires explicit written consent and frequently meets resistance if raised too late in the design process.
Disputed schedules of condition are another recurring flashpoint, usually because one side photographed the shared wall hastily or incompletely before work started, leaving room for argument about whether a crack was pre-existing. Access disagreements follow close behind, particularly where scaffolding or excavation support needs to sit temporarily on the neighbour’s side. Finally, notices served without proper plans and sections are routinely challenged or delayed, since surveyors cannot verify Section 6 compliance from a written description alone. Getting your drawings right before serving notice avoids the single most common cause of a stalled start date.

Do you need extra insurance during party wall works?
Standard buildings insurance rarely covers the specific risks that come with excavation and structural work near a shared boundary, so it is worth checking your policy before work starts, not after something goes wrong.
Contractors carrying out groundworks and foundation work should hold their own public liability and contractors’ all-risks cover, and it is reasonable to ask for proof of this before appointment. Separately, homeowners should tell their own buildings insurer about planned structural work, since some policies exclude damage arising from notified building works if the insurer was not informed in advance, which matters if your own property is damaged during the build.
The schedule of condition compiled during the Award process becomes central if an insurance claim ever follows a dispute about damage, since it is the evidential baseline both insurers will look to first. Where excavation involves underpinning or is close to the more demanding Section 6 threshold, some Awards require monitoring equipment to track ground movement throughout the works, and any resulting reports are worth keeping alongside your insurance paperwork as further evidence the works were properly controlled.
Publisher perspective: what site experience teaches about party wall extensions
Groundworks rarely go exactly to plan. Unexpected foundation depths, buried drainage, or the need for last-minute underpinning are common once a trench is actually open, whatever the drawings said beforehand. Neighbour access for scaffolding or monitoring equipment is frequently the detail resolved on-site, not on paper. Bringing groundworks and civil engineering expertise in during the design stage, rather than after notices are served, tends to reduce redesign, delay, and the friction that turns a routine extension into a dispute.
— George
Party wall support from contractors
If your extension is heading toward excavation near a shared boundary, consider a single point of contact for the groundworks itself, rather than juggling a surveyor’s Award and a separate contractor guessing at foundation depths after the fact. Contractors may handle site setup, foundations, and controlled strip-out or demolition where an extension needs internal work near a party wall, and can support monitoring where an Award requires it during excavation.

A practical first step is a site visit and drawings review, so foundation depths, excavation extent, and access requirements are understood before your notices go out, not discovered halfway through the dig. Fees vary depending on scope, ground conditions, and how many adjoining owners are involved, but that initial review is where every project should start. Get in touch through our groundworks and foundation services page to arrange a site visit and discuss your extension.
Sources
The Party Wall etc. Act 1996 explanatory booklet covers the statute itself; GOV.UK’s overview explains your general obligations; RICS sets professional surveying standards.
This article is general information, not a substitute for advice from a qualified lawyer. Consult a qualified legal professional about your own circumstances before acting on anything here.
- Party Wall etc. Act 1996 — section 6 (adjacent excavation and construction)
- Party wall legislation and procedure — RICS (7th edition)
- Excavation works and party wall rules — Survey of Party Wall
Recommended
A permit to dig is required whenever excavation carries a credible risk of striking buried services or causing ground collapse. That risk, not a fixed depth, is the trigger. Under CDM 2015, excavations demand competent inspection, and HSE HSG47 sets the safe digging expectations behind that permit. If you’re unsure whether the ground you’re breaking qualifies, stop and arrange a survey before starting excavation.
TL;DR:
- A permit to dig is necessary when there is a credible risk of hitting buried services or causing ground collapse, regardless of excavation depth.
- It must include detailed information such as precise location, depth, method, utility references, and verification evidence like CAT scans and trial holes.
- Pre-start checks involve obtaining up-to-date utility drawings, conducting scans, confirming with trial holes, and coordinating with service owners for written agreements.
- Ongoing inspection at every shift, after stability changes, and following material falls is mandatory to maintain permit validity and safety.
- Common failures include relying on outdated drawings, broad permits, neglecting reissuance during progress, and skipping verification steps, which increase incident risk.
Table of Contents
- What is a permit to dig and when do you need one?
- The UK legal framework behind every permit
- Pre-start checks that make a permit defensible
- Building the permit: fields, authorisation and close-out
- Running the permit safely once digging starts
- Where permits go wrong on real sites
- A worked example from the field
- Why disciplined permitting protects the whole project
- Get compliant groundworks support from GCS Contractors
- Sources
What is a permit to dig and when do you need one?
A permit to dig is a site specific document that records where buried services have been located, what controls are in place, and who has authorised the work to proceed. It’s the paperwork that turns “we think it’s safe” into “we’ve proven it’s safe” — and it’s the first thing an HSE inspector will ask to see after an incident.
You need one for more jobs than most site managers assume. PermitPad’s guidance treats the permit as necessary whenever there’s a credible chance of hitting services or triggering a collapse, regardless of depth. That covers:
- Mechanical excavation of any kind, including trenching and foundation digging
- Hand digging near suspected services, even shallow work with a spade or fork
- Fence post holes, bollard installations, and signage footings near utility corridors
- Piling operations and any work adjacent to roads or known service runs
A shallow garden trench in genuinely virgin ground with no service history might not need one. Anything near a road, a building, or an area with any recorded utility presence does.
The UK legal framework behind every permit
Three separate regimes govern excavation, and mixing them up is where contractors get caught out. CDM 2015 Regulation 22 requires “all practicable steps” to prevent collapse and mandates inspection by a competent person at the start of every shift, after any event likely to affect stability, and after any unintended fall of material. Excavation collapse still contributes to roughly five deaths and hundreds of serious injuries annually in UK construction, which is why this duty carries real weight rather than being a box-ticking formality.
Statistic to remember: HSG47 restricts mechanical excavation to within 500mm of any detected service, beyond which you must switch to hand digging or vacuum excavation.
The safe digging hierarchy that underpins any credible permit runs:
- Obtain up to date service drawings from every relevant utility owner
- Scan the area with a cable avoidance tool and signal generator (CAT and Genny)
- Mark confirmed routes on the ground and hand dig within the 500mm buffer
Where work touches the public highway, you need a separate street works licence under NRSWA, which carries its own notice periods and conditions. Some local authorities also publish permit guidance for works affecting the highway from private land. Building Regulations add another layer: certain groundworks need advance notice to the local authority before excavations or drains are covered over, under regulation 16 of the Building Regulations 2010.
Pre-start checks that make a permit defensible
A permit is only as good as the verification behind it. Skip the checks and you’ve written a piece of paper that won’t hold up under scrutiny, let alone protect your team. Work through these steps in order before anyone signs off:
- Pull utility drawings from every service owner and log the version and issue date on the permit itself. Drawings older than a year deserve extra scepticism.
- Run a CAT and Genny scan across the full dig footprint, and record who operated the equipment, what model was used, and the readings obtained.
- Dig trial holes or inspection pits to physically confirm depths and positions before any mechanical plant touches the ground.
- Contact service owners directly where drawings are ambiguous or the corridor is congested, and get written safe working agreements where they’ll attend site.
Pro Tip: Never let a trial hole finding contradict the drawing without escalating it. If the pit shows a service 400mm off the drawn position, treat the whole drawing as unreliable until the owner confirms otherwise.
Our utility trenching guidance for Cambridge walks through this verification sequence in more depth if you’re setting up the process for the first time.
Building the permit: fields, authorisation and close-out
A permit that doesn’t specify exactly where and how deep the dig goes is barely worth issuing. Industry templates build in fields for buried services checks, shoring requirements, atmospheric testing, emergency rescue arrangements, and a daily inspection log to satisfy CDM 2015.
The permit needs to capture:
- A precise dig description, referenced against gridlines or fixed offsets, not a vague area outline
- Depth, method, and expected duration of the work
- Utility drawing references with dates, plus CAT/Genny evidence attached
- Trial hole findings recorded against the drawing predictions
| Field category | What it must record |
|---|---|
| Authorisation | Competent person signature, responsible supervisor, permit validity dates |
| Revision control | Version number and reason for any reissue as the dig advances |
| Close-out | Daily inspection sign-offs, completion confirmation, record retention period |
Validity matters as much as content. A permit issued for one working area shouldn’t silently cover a different face further along the trench. It needs reissuing or formal amendment as the dig progresses, so the CAT results and trial holes on file actually match the ground being worked.
Running the permit safely once digging starts
Issuing the permit is the easy part. Keeping it valid through the working day is where discipline slips. CDM 2015 Schedule 2 inspection timing applies here directly: a competent person checks the excavation at the start of every shift, after anything that might affect stability (heavy rain, nearby vibration, a change in load), and after any fall of material.
- Record each inspection with time, findings, and the inspector’s name, not just a tick
- Decide on support method (battering, benching, or shoring) based on ground conditions, water, and adjacent loadings rather than depth alone
- Trigger atmospheric testing wherever confined space conditions are plausible, including deep or enclosed trenches
- Know the immediate response for a service strike: stop work, isolate where safe, and notify the asset owner before continuing
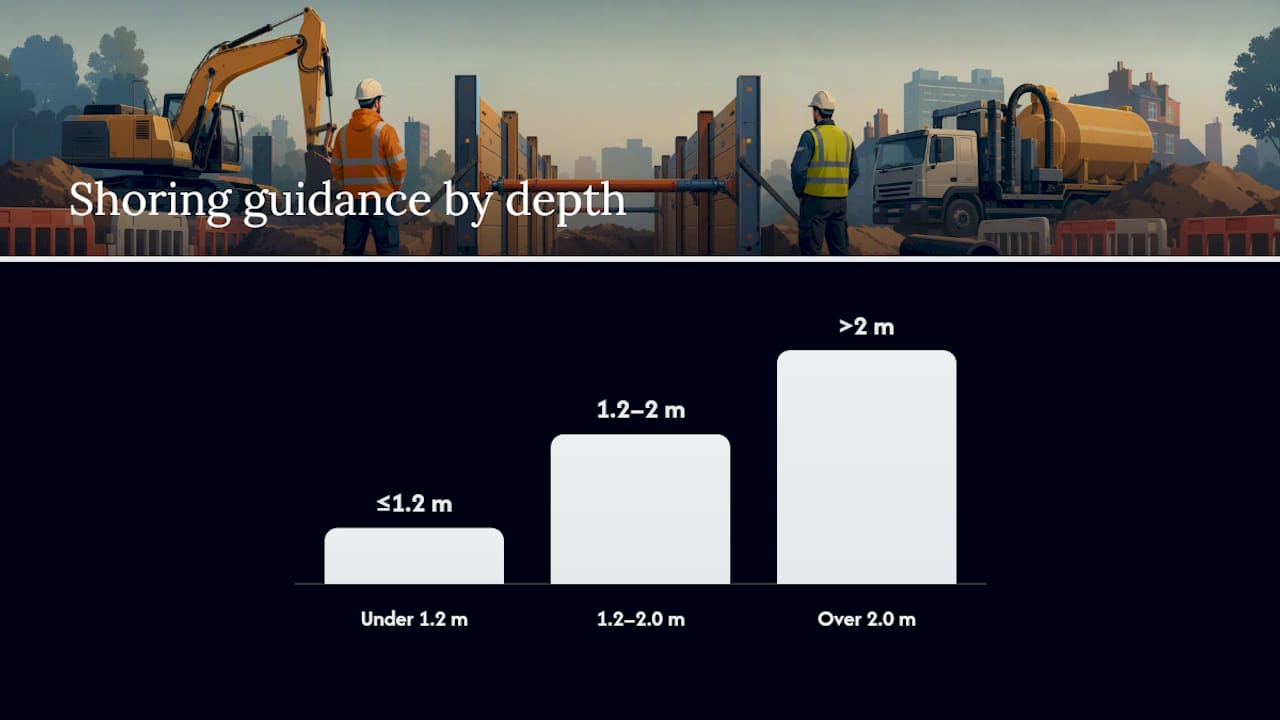
Pro Tip: As a rough guide, excavations under 1.2 metres in stable ground may not need formal shoring, 1.2 to 2 metres calls for a proper assessment, and beyond 2 metres you’re almost always into engineered support territory. Soil type and water table override the numbers every time.
Our excavation safety guidance and deep excavation checklist both expand on shoring decisions and inspection records if you’re building this into a site procedure.
Where permits go wrong on real sites
Most excavation incidents trace back to a handful of repeatable failures, not exotic bad luck. Recognise these patterns and you’ll catch the mistake before it becomes an incident report.
- Relying on a drawing without a trial hole, because the drawing “looked recent enough”
- Treating emergency works as exempt from CAT/Genny and trial hole checks. They aren’t. Emergency status changes the urgency, not the duty to locate services safely
- Writing a permit for a broad area rather than a specific task, which lets crews drift into unchecked ground
- Failing to reissue the permit as the excavation moves along a trench, leaving stale evidence attached to live work
Every one of these is an administrative shortcut that feels harmless until a machine bucket meets a gas main. Digital permit systems are closing this gap by making it easier to attach CAT photos, timestamp inspections, and flag when a permit needs reissuing rather than quietly extending.
A worked example from the field
On a recent Cambridge groundworks package, our supervisors ran the desktop review first: utility drawings pulled and dated, then a full CAT and Genny sweep of the trench line before any plant arrived. Trial holes at three points confirmed a gas service sat 300mm off the drawn position, which triggered a written safe working agreement with the utility owner before digging resumed.
What made the permit auditable wasn’t the paperwork alone. It was the evidence attached to it:
- CAT scan photos and Genny readings filed against the permit reference
- Drawing extracts annotated with trial hole findings
- Daily inspection sign-offs logged against Regulation 22 timing
- A revised permit issued when the trench advanced past the surveyed section
Our site preparation guide covers how this fits into the broader pre-start sequence for compliant UK projects.
Why disciplined permitting protects the whole project
I’ve seen enough groundworks packages to know that permits rarely fail because teams don’t understand the rules. They fail because someone decided the drawing was “close enough.” Good permitting isn’t paperwork for its own sake. It cuts programme delays, avoids the claims that follow a service strike, and protects a contractor’s reputation with the client long after the trench is backfilled. If your team needs support building that discipline into daily practice, GCS Contractors can help.
— George
Get compliant groundworks support from GCS Contractors
Gcscontractors gives you what a generic checklist can’t: supervisors who have actually issued and closed out excavation permits on live Cambridge and East Anglia sites, working alongside utility owners rather than around them.
We support permitted digs with competent supervisors trained against CDM 2015 Regulation 22, ready-built permit templates covering CAT/Genny evidence and trial hole records, and direct liaison with service owners where drawings need clarifying. Whether you’re planning trenching, foundations, or roadworks, we handle the pre-start surveys and daily inspection regime so your programme doesn’t stall waiting on paperwork. For deeper groundworks, our groundworks and foundation services in Cambridge page covers the full scope. If a specialist earthing or drilling issue turns up mid-dig, Indelec’s deep earth grounding services are worth knowing about too. Get in touch for a quote on your next excavation package and we’ll talk through what permitting support your site actually needs.
Sources
- The Construction (Design and Management) Regulations 2015
- HSG47 Avoiding danger from underground services
- Street works licence (England, Scotland and Wales)
- When Do You Need a Permit to Dig? (UK Guide) | PermitPad
- Excavation Permit Template | Safe Digging Permit Form
Recommended
Approved Document H sets the technical guidance for drainage and waste disposal under the Building Regulations, covering everything from foul water connections to soakaway design across its six sections, H1 to H6. Foul water should connect to the public sewer where that’s reasonably practicable, with surface water kept separate unless your local authority permits otherwise. The practical next step is straightforward: check Approved Document H against your specific site, then get Building Control and your sewerage undertaker involved before you dig.
TL;DR:
- Connecting to a public sewer is the preferred option if it is reasonably accessible, with private sewers or treatment systems as fallback options.
- Sustainable drainage systems are generally expected to be considered first for managing rainwater, unless ground conditions favor soakaways.
- Building over or near a sewer requires prior permission from the sewer owner, with foundations planned to preserve access and avoid structural conflicts.
- Proper gradients and separation of foul and surface water pipes are essential to prevent blockages and ensure ease of maintenance, with inspection milestones critical for approval.
- Coordinating drainage design at tender stage with groundworks and foundation planning helps avoid costly rework, as most failures happen during inspection or subsequent backfilling.
Table of Contents
- What does Part H actually cover?
- H1: how does the foul water drainage hierarchy work?
- H2: what are your options when there’s no public sewer?
- H3: when should you use SuDS instead of a soakaway?
- H4: what permissions do you need to build over a sewer?
- H5 and H6: gradients, separation and waste storage
- How does Building Control inspect drainage, and what should you have ready?
- GCS Contractors’ on-site perspective: coordinating drainage with groundworks
- How GCS Contractors delivers compliant drainage and groundworks
- Where to find the official Part H guidance
- Sources
What does Part H actually cover?
Part H splits into six sections, each dealing with a distinct part of a drainage system. Between them, they cover:
- H1 – Foul water drainage (pipe sizes, connections, hierarchy)
- H2 – Wastewater treatment systems and cesspools
- H3 – Rainwater drainage and SuDS (sustainable drainage systems)
- H4 – Building over sewers
- H5 – Separate systems of drainage
- H6 – Solid waste storage
The guidance applies to work in England, though Wales has its own equivalent framework with broadly similar principles. Approved Documents describe one way of meeting the regulations, not the only way. Alternative solutions are acceptable if you can demonstrate they achieve the same standard.
H1: how does the foul water drainage hierarchy work?
Building Regulations expect you to follow a strict pecking order when deciding where foul water goes. You connect to the public sewer first if it’s reasonably practicable; only when that’s ruled out do you consider a private sewer, then a septic tank or package treatment plant, and a cesspool as the last resort.
- Public sewer (preferred wherever accessible)
- Private sewer
- Septic tank or package treatment plant
- Cesspool (last resort, no outlet)
Minimum drain diameters: foul drains serving a single dwelling typically need a minimum internal diameter of 75mm, though runs carrying WC discharge usually require 100mm because of the solids load. Pumping stations become necessary where gravity flow to the sewer isn’t achievable, and anyone connecting to a public sewer must give the sewerage undertaker at least three weeks’ notice before work starts.
H2: what are your options when there’s no public sewer?
Where a public sewer isn’t within reach, you’re choosing between a septic tank, a package treatment plant, or occasionally a cesspool. Each has a different footprint and a different maintenance burden.
- Septic tanks rely on a soakaway or drainage field, so they need a percolation test to confirm the ground can absorb the discharge.
- Package treatment plants treat wastewater more thoroughly on site and suit smaller plots where percolation is poor.
- Cesspools hold waste with no outlet at all, meaning regular emptying by tanker.
Siting rules matter: treatment systems generally need to sit a set distance from habitable buildings and watercourses. Whichever system you choose, maintenance responsibility sits with the property owner unless a formal adoption agreement transfers it elsewhere.
H3: when should you use SuDS instead of a soakaway?
Sustainable drainage systems (SuDS) are the preferred approach for managing rainwater under current national standards, and Building Control will usually expect you to have considered them before defaulting to a straight pipe-to-sewer solution. SuDS features, permeable paving, attenuation ponds, swales, which mimic natural drainage patterns rather than shifting the problem downstream.
Soakaways remain the standard domestic solution where ground conditions allow. They are generally located at a safe distance from buildings, and their size depends on ground percolation properties. Poor percolation means a bigger soakaway or a different solution altogether.
- SuDS features are the default preference under national standards
- Soakaways typically require a minimum 5m distance from buildings
- Ground percolation testing determines viable soakaway sizing
- Surface water can discharge to a combined sewer only where SuDS aren’t feasible, and combined flow usually demands larger pipe diameters
Pro Tip: Adoption of SuDS by the local authority or water company is rare in practice, so budget for long-term maintenance yourself rather than assuming someone else will take it on. GCS Contractors has covered this in more depth in a guide to SuDS drainage installation for Essex projects.
H4: what permissions do you need to build over a sewer?
Building over or near a public sewer isn’t automatically off limits, but it does trigger a legal requirement to contact the sewer owner, usually the local water company, before any work begins.
- Establish ownership. Confirm whether the drain or sewer is public or private, since this determines who you need permission from.
- Choose a method. Options typically include diverting the sewer around the new structure, bridging over it with a suitably designed foundation, or leaving a dedicated access point.
- Preserve access. Whatever method you choose, the sewer must remain maintainable, meaning future repair crews can still reach it without demolishing your extension.
- Plan foundations around it. Where excavation for footings comes close to an existing drain, invert levels and load spread become part of the structural design, not an afterthought.
H5 and H6: gradients, separation and waste storage
Keeping foul and surface water in separate pipe runs is the default expectation under H5, and for good reason: combine the two and you need larger pipes to handle peak flow, plus a more complex connection at the point of discharge.
Gradients are where most schemes come unstuck. Too steep, and solids outpace the water and get left behind; too shallow, and the flow can’t self-cleanse, leading to blockages. BS EN 12056 and the fall tables in Approved Document H set out acceptable ranges, and every run needs checking against fixed floor and foundation levels before you commit to a design.
- Foul and surface water systems stay separate by default
- Combined flows require larger pipe diameters at the point of connection
- Inspection chambers need siting at every change of direction or gradient, with clear access maintained
- H6 sets minimum requirements for solid waste storage, generally a bin store within reasonable carrying distance of the collection point
Get the gradient wrong on even a short run and you’re looking at a full re-lay before Building Control will sign off.
How does Building Control inspect drainage, and what should you have ready?
Inspectors follow a fairly consistent pattern, and knowing it in advance saves you from expensive rework once pipework is buried.
- Documentation first. Have your drainage layout drawings, percolation test results (where relevant), pipe-sizing calculations, and any sewerage undertaker correspondence ready before the inspector arrives.
- Gradient verification. The inspector checks falls against the design figures, often with a level, before anything gets covered.
- Bedding and jointing checks. Pipes need correct granular bedding and properly sealed joints. This is one of the most common points of failure on smaller domestic jobs.
- Inspection chamber access. Chambers must be positioned and sized so future maintenance is genuinely possible, not just technically present.
- Air or water testing before backfill. This is the step that catches most problems. According to practitioner reporting on extension drainage, failed gradient checks and inadequate chamber access are the leading causes of rework on domestic drainage projects.
Pro Tip: Lock inspection milestones into your programme before groundworks start. An inspector who can’t attend on the day you need backfill often means a week’s delay, not a same-day fix.
GCS Contractors’ on-site perspective: coordinating drainage with groundworks
Drainage rarely fails in isolation. It fails at the point where it meets structure, and that’s the seam most self-builders and even some contractors underestimate.
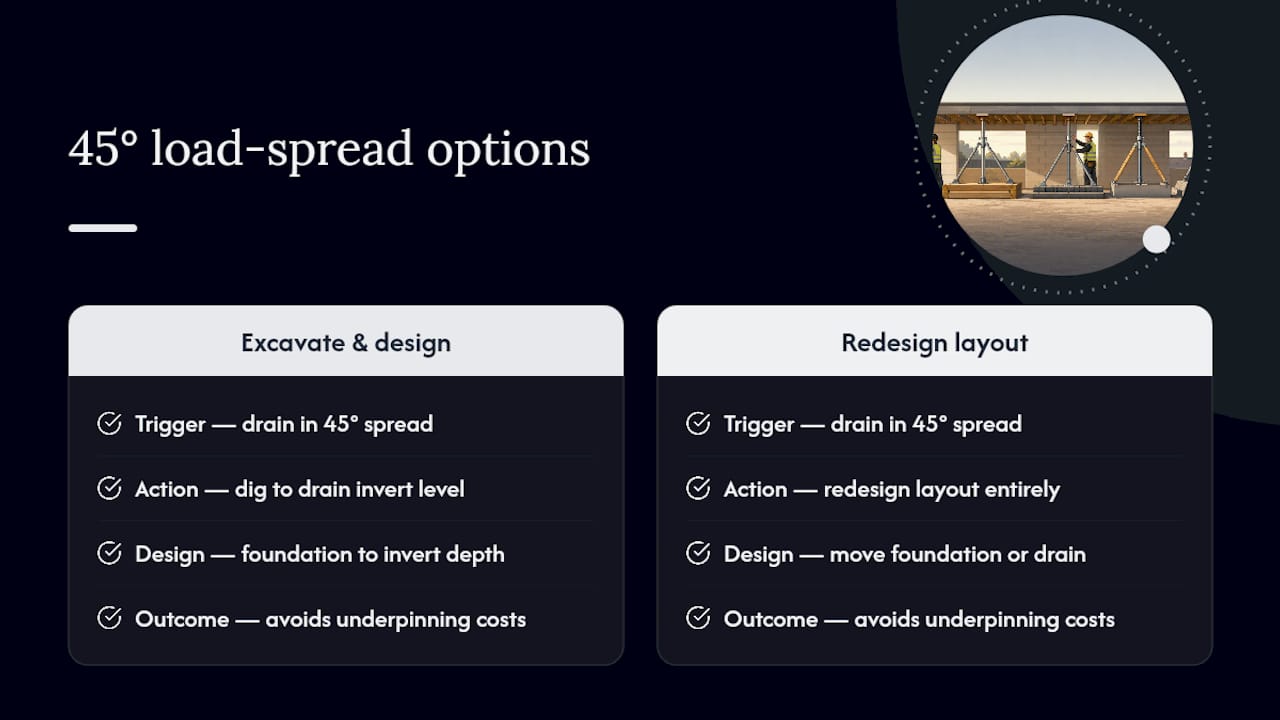
The 45° rule catches people out constantly. If a drain sits within the 45° load spread of a new foundation, you can’t just excavate around it and hope. You either dig down to the drain’s invert level and design the foundation accordingly, or you redesign the layout entirely. Get this wrong and you’re looking at underpinning costs nobody priced into the job.
We schedule Building Control inspections before backfill as a fixed milestone, not a courtesy call. Backfilling before sign-off means digging it all back out if the inspector finds a problem, and that’s a cost that lands squarely on the programme, not just the budget.
The fix starts at tender stage. Drainage details need pricing and sequencing as a distinct package, with invert levels and foundation depths cross-checked before anyone breaks ground. Leave it to be sorted “on site” and you’re gambling with the one part of the build that’s hardest to inspect once it’s covered.
— George
How GCS Contractors delivers compliant drainage and groundworks
GCS Contractors is the practical alternative to piecing together separate drainage and groundworks contractors for the same job. Coordinating foundations, drainage, and Building Control liaison under one team means invert levels, gradients, and inspection scheduling get resolved before they become a problem on site, not after backfill’s already gone in.
Our teams across Cambridge and East Anglia handle drainage installation, foundations and groundworks, and the day-to-day liaison with Building Control and sewerage undertakers that Part H demands. That combination matters because the two most common causes of inspection failure, gradient errors and poor chamber access, both sit at the boundary between groundworks and drainage design. Keeping that boundary inside one team’s responsibility is how you avoid the rework that eats into programme and budget alike.
If you’ve got an extension, new build, or development site where drainage and foundations need to work together from day one, look at our groundworks and foundation services in Cambridge and get in touch to talk through your site specifics before you finalise a design.
Where to find the official Part H guidance
For anything site-specific, go straight to the primary sources rather than relying on summaries.
- Approved Document H (2015 edition) for the full technical tables on pipe sizes, gradients and testing
- The Gov for updates and official publication history
- Planning Portal’s Part H summary for a plainer-language walkthrough
- The national SuDS standards for rainwater design and maintenance expectations
Always confirm site-specific calls, percolation results, adoption status, sewer diversions, with your local Building Control body and sewerage undertaker directly. Guidance documents set the standard; they don’t replace a conversation with the people who’ll actually sign off your drainage.
Sources
- Approved Document H: drainage and waste disposal (2015 edition)
- Drainage and waste disposal: Approved Document H
- Part H – Drainage and Waste Disposal (Planning Portal)
- How to get your extension drainage right | Homebuilding
Recommended
Section 61 of the Control of Pollution Act 1974 lets contractors apply for prior consent to carry out noisy or vibration-heavy construction work. Get it granted and comply with the conditions, and your local authority cannot then serve a Section 60 notice for the same works. The next move is straightforward: draft your application and get it in front of the environmental health officer early, because the statutory clock runs to 28 days once a formal submission lands.
TL;DR:
- Applying early for Section 61 consent helps contractors secure lawful working conditions and avoid reactive noise restrictions through Section 60 notices.
- A comprehensive application must include sound modeling, detailed plant lists, proposed hours, monitoring plans, and resident notification strategies to meet approval criteria.
- Engaging in a drafted consultation six weeks prior to work start allows for adjustments based on environmental health officer feedback, increasing chances of approval.
- Changes to existing consents, such as extensions or temporary exceptions, require separate applications, with tracking and documentation crucial for defending against complaints.
- Success depends more on timing and being detailed and realistic in modeling than on the amount of paperwork completed.
Table of Contents
- What is Section 61 consent and why do contractors bother with it?
- Who applies for Section 61 consent and what they’re responsible for
- Building a Section 61 application that gets approved first time
- Draft-stage negotiation: the step contractors skip at their own cost
- Changing an existing consent: variations, dispensations and what happens if the council doesn’t respond
- A week-by-week checklist for your Section 61 application
- Where BS 5228 fits and what good monitoring looks like
- How Gcscontractors approaches Section 61 applications on live sites
- Where to find the official Section 61 guidance and standards
- Why the paperwork matters less than the timing
- Sources
What is Section 61 consent and why do contractors bother with it?
Section 61 gives contractors something rare in construction law: a way to get ahead of enforcement rather than react to it. The statutory provision allows an application for prior consent to carry out works likely to generate noise or vibration, and it is entirely voluntary. Nobody forces you to apply. But once a council grants consent and you stick to its terms, that consent becomes a shield.
Compare that with the alternative. A Section 60 notice is the council’s enforcement tool, imposed reactively once noise has already become a problem for neighbours. It can dictate working hours, ban certain plant, and cap noise or vibration levels, often at short notice and mid-programme. That is expensive to absorb once a piling rig is already on site.
Councils tend to expect a Section 61 application for piling, demolition, or heavy groundworks near residential or sensitive receptors, night-time or weekend working outside standard hours, multi-phase developments running for an extended period, and sites where an earlier project on the same street generated complaints

Contractors who apply early are not just ticking a box. They are buying certainty. Once consent is granted on agreed terms, the goalposts stop moving.
Who applies for Section 61 consent and what they’re responsible for
The application should come from whoever is actually running the site, not the developer’s head office. In practice, that means the principal contractor or a named company director or site manager with the authority to commit to the working methods described in the application. Councils want a real point of contact, not a generic company name.
Most local authority forms ask for:
- Full company name, registered address and company number
- Named applicant with direct contact details (phone and email that get answered)
- The relevant planning application reference, where one exists
- Site address and a description of the works
- Confirmation of who holds day-to-day responsibility for compliance
Signing the application does not end your obligations. The named applicant carries responsibility for every subcontractor working under that consent, which means piling subcontractors, demolition crews and even short-term plant hire firms all need briefing on the agreed hours, plant restrictions and monitoring commitments. Councils expect the principal contractor to retain monitoring records and daily logs for the life of the works, and to produce them on request. If an Environmental Health Officer turns up unannounced and asks for last week’s noise readings, “we’ll dig them out” is not a good answer.
Building a Section 61 application that gets approved first time
Applications get rejected or delayed for the same handful of reasons every time: missing technical detail, vague working hours, or no evidence that noise has actually been modelled. Councils are not looking for perfection. They are looking for proof you have thought it through.
A complete submission generally needs:
- Noise and vibration predictions modelled to BS 5228 methodology, with clearly identified receptor locations (the nearest homes, schools or offices likely to be affected)
- A full plant list with sound power levels for every major item, from excavators to generators, alongside method statements and a phased programme showing when each piece of plant is in use
- Proposed working hours, matched against the council’s standard construction hours, plus the Best Practicable Means (BPM) measures you will use to keep noise down
- A monitoring plan naming fixed or mobile monitoring locations, trigger and action levels that prompt a response, how often data gets reported, and how the council can access it
- Site plans and resident notification strategy, showing boundary hoarding, access routes, and how nearby residents will be told what is coming and when
The strongest applications treat resident notification as more than a legal nicety. A letter drop two weeks before piling starts, with a named contact number and expected duration, heads off complaints before they start.
Pro Tip: Model your worst-case scenario, not your average day. If your piling rig runs at full capacity for three consecutive days early in the programme, predict that scenario specifically rather than an averaged figure across the whole job. Councils spot averaged-down predictions immediately, and it undermines trust in the rest of your submission.
Draft-stage negotiation: the step contractors skip at their own cost
Submitting a final application cold, with no informal conversation first, is one of the most common mistakes contractors make. The three-stage process runs preparatory, draft, then final. Skip the draft stage and you are effectively asking the council to accept your working methods blind.
For anything beyond a small domestic job, submit a draft application roughly six weeks before works are due to start. That gives the Environmental Health Officer time to review your predictions, raise concerns, and propose draft conditions before anything is locked in statutorily.
- Treat the draft stage as a genuine conversation, not a formality to rush through
- Bring evidence rather than assurances: noise modelling outputs, BPM measures, and a monitoring commitment carry far more weight than a promise to “keep it quiet”
- Offering the council live access to your monitoring data during negotiation is often the single most persuasive move available
- Early engagement consistently produces less restrictive final conditions, because the EHO has had time to test your numbers rather than react to them
The 28-day statutory window only bites once you submit the formal, final application. Draft consultation sits outside that clock entirely, which is exactly why it is worth the extra weeks upfront. Rushing straight to a final submission without draft feedback is a false economy that regularly produces rejected applications or conditions far tighter than necessary.
Changing an existing consent: variations, dispensations and what happens if the council doesn’t respond
Projects change. Piling methods get revised, working hours shift, new plant arrives on site. A variation amends the terms of an existing consent, while a dispensation is a short-term, specific exception, typically used for a one-off event such as an unplanned overnight concrete pour or an urgent structural repair.
- Apply for a variation when the change is ongoing or programme-wide, such as extended hours for the remainder of a phase
- Apply for a dispensation when the departure is temporary and justified by a specific event, particularly a health and safety or engineering necessity
- Some councils, including Westminster, operate an emergency route allowing notice windows as short as 48 hours for genuine safety-critical works, though local rules vary and should be confirmed directly
- If a council fails to determine your application within the statutory period, or imposes conditions you consider unreasonable, the appeal route runs through the magistrates’ court, and time limits apply, so take advice promptly rather than letting the deadline lapse
- Keep a dated record of every variation, dispensation and resident notification issued during the works, because this paper trail is what protects you if a complaint escalates later
A week-by-week checklist for your Section 61 application
Treat the application as a programme milestone with its own lead time, not an afterthought bolted onto the works package.
- Weeks 1 to 2: Survey the site and its neighbours. Appoint an acoustic consultant if the works involve piling, demolition or heavy plant near sensitive receptors. Map who is likely to be affected and start informal contact with residents’ associations or adjoining businesses.
- Weeks 3 to 4: Compile the technical package: BS 5228 predictions, plant list, method statements, and a draft monitoring plan.
- Around 6 weeks before start: Submit the draft application to the local EHO and open the conversation on conditions.
- Following draft feedback: Revise predictions or mitigation measures based on what the council raises, then prepare the final submission.
- At least 28 days before works start: Submit the final, formal Section 61 application to trigger the statutory response window.
- On site: Implement Best Practicable Means, install monitoring equipment at agreed points, log daily readings, and issue the resident notification you promised in the application.
- Throughout the works: Respond to any complaint within 24 hours where possible. A fast, specific reply (what caused the noise, what you are doing about it) defuses far more disputes than silence ever does.
Pro Tip: Keep a single, dated complaints log from day one, even if you receive nothing in the first month. An empty log with consistent dates is stronger evidence of good management than no log at all if a dispute ever reaches a council review.
Where BS 5228 fits and what good monitoring looks like
Councils treat compliance with BS 5228, the Code of Practice for Noise and Vibration on Construction and Open Sites, as the baseline standard for any technical prediction in a Section 61 application. The standard covers both noise prediction methodology and vibration guidance, including annexes that many EHOs refer to directly when assessing submissions.
- Present predicted noise levels alongside recognised receptor thresholds, not in isolation, so the council can see the margin you are working to
- Set trigger and action levels that prompt a specific response, such as pausing a particular plant item, rather than a vague “we will investigate”
- Use monitoring equipment capable of continuous data logging, and offer the council remote or live access where practical
- A submission built on BS 5228 methodology, rather than generic assurances, is consistently what separates applications that clear the draft stage quickly from those sent back for revision
Real-world conditions show what councils actually accept in practice. One Cambridge planning condition specified preference for quieter CFA piling methods over percussive alternatives, alongside hoarding and phased sequencing to avoid running multiple noisy operations simultaneously. That is the level of specificity worth matching in your own submission.
How Gcscontractors approaches Section 61 applications on live sites
Gcscontractors has built a working checklist for every project where noise or vibration consent is likely to be needed, covering groundworks, demolition, and civil engineering packages across Cambridge and East Anglia. The approach starts at tender stage, not after mobilisation, because retrofitting a mitigation strategy onto an already-programmed job rarely works.
- Plant selection favours quieter methods where the ground conditions allow it, including CFA piling ahead of percussive alternatives
- Sequencing is built into the programme so that the loudest operations do not overlap, reducing cumulative noise at the nearest receptors
- Hoarding and monitoring stations go up before noisy work begins, not once a complaint arrives
- Resident notification is handled directly by the site team, with a named contact rather than a generic head office number
- Ongoing compliance monitoring feeds back into daily records, so if an EHO requests data mid-project, it is ready
Contractors managing their own Section 61 submission for the first time often underestimate the lead-in time, particularly around draft consultation. If you want a second opinion on your working methods or mitigation plan before submission, Gcscontractors’ strip-out and demolition guidance sets out the site preparation standards that typically underpin a strong application.
Where to find the official Section 61 guidance and standards
Start with the primary legislation and your specific local authority’s own template, since forms and expectations differ between councils.
- The statutory text itself sits on legislation.gov.uk, including the 28-day response provision
- Detailed contractor guidance is published by councils including LBHF, Tower Hamlets, Elmbridge and Westminster, each with slightly different form layouts
- Always check your specific local authority’s planning or environmental health pages for its own application form, since a template built for one council rarely transfers cleanly to another
- BS 5228 itself is available for purchase through BSI, and the Chartered Institute of Environmental Health publishes supporting guidance many councils reference directly
Why the paperwork matters less than the timing
Most guidance on Section 61 fixates on the form itself: what boxes to fill in, what plant list format to use. That misses the actual lever that determines whether an application succeeds. Timing does more work than paperwork ever will.
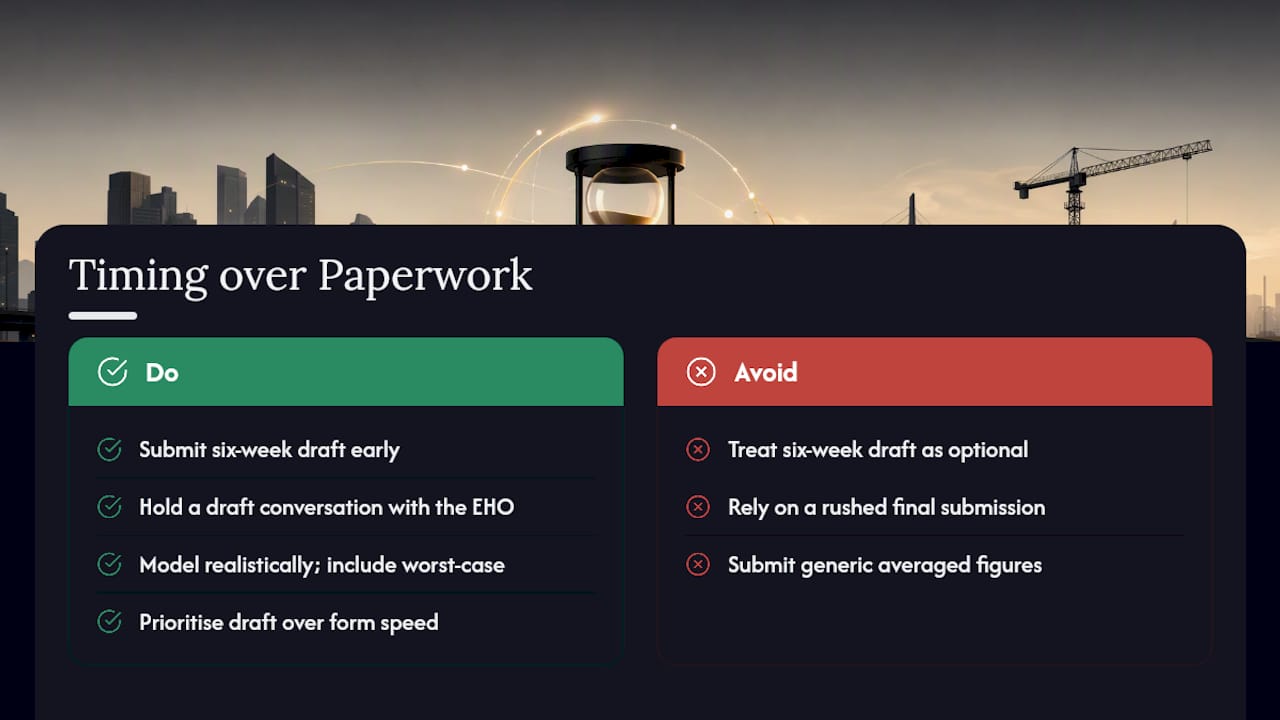
The six-week draft submission is routinely treated as optional by contractors under programme pressure, and that is the single biggest mistake in this entire process. A rushed final submission with no prior conversation puts the EHO in a defensive position: they have never seen your numbers before, so they impose the most cautious conditions available to them. A draft submitted early does the opposite. It turns the EHO into someone who has already tested your predictions and had a chance to push back before anything is fixed.
The other overlooked point is that BS 5228 compliance is not a compliance exercise, it is a negotiating asset. Contractors who model realistically, including worst-case scenarios rather than averaged ones, consistently secure looser conditions than those who submit generic figures and hope nobody checks. Prioritise the draft conversation and honest modelling over form-filling speed, and the rest of the process tends to fall into place.
— George
Sources
- Control of Pollution Act 1974, Section 61
- Contractor guidance note for Section 61 applications (prior consent) | LBHF
- Construction sites (Cambridge) — BS 5228 expectation
- Planning noise condition example — Cambridge document
Recommended
For a 2026 UK extension, budget a typical range per m² for the structural shell, split roughly into basic, standard and premium specifications without specific figures. These figures cover the build itself, not VAT, professional fees or specialist fit-out, and London or the South East typically adds a further 20% to 30% on top. Treat them as a starting point rather than a quote.
TL;DR:
- Ground conditions can drastically alter foundation costs, making site-specific surveys essential before setting a firm budget.
- Regional uplifts in London and the South East typically add 20% to 30% to national per-m² rates, especially for skilled labor and site constraints.
- Glazing, structural steels, and foundation complexities are the main drivers behind significant cost variations within the shell build.
- Additional expenses such as party wall surveys, utility diversions, and site setup are common hidden costs that can substantially inflate overall budgets.
- Properly breaking down costs by element and region provides a more accurate project estimate than relying solely on a per-m² rate.
Table of Contents
- Extension cost per m2 UK: the quick-reference table
- How does extension type affect cost per m2?
- What does the per-m² rate actually pay for?
- Do London and the South East really cost 30% more?
- How do you turn a per-m² rate into a full project budget?
- What hidden costs catch homeowners out?
- How long does a typical extension project take?
- Do you need planning permission for an extension?
- Why groundworks estimates vary so much between quotes
- Where can you verify these figures yourself?
- What the numbers actually tell you about budgeting an extension
- Get a groundworks quote built on real site data, not a national average
- Sources
Extension cost per m2 UK: the quick-reference table
Once you know which specification band fits your plans, converting a per-m² rate into a total is simple arithmetic. The table below sets out what each tier typically buys, based on figures reported across the FMB’s national cost guidance and specification breakdowns from RenoCalc’s 2026 shell cost data.
Multiply the rate by your floor area to see how quickly totals scale; smaller extensions cost less overall, larger extensions increase totals accordingly.
Those figures are shell costs only. Layer on the extras before you set a final budget:
- VAT: usually charged at the standard UK rate on labour and materials unless a specific exemption applies, per Gov.
- Professional fees and contingency: are additional costs to consider, often adding some percentage of the build cost.
How does extension type affect cost per m2?
Floor area tells you very little on its own. The shape of the extension, how much of the existing house it disrupts, and how many walls need opening up all move the per-m² rate significantly.
- Single-storey rear extensions sit at the lower end for shell costs but the finish level varies wildly. Kitchens, bifold doors and roof lanterns push a straightforward rear extension from around £2,200/m² towards £3,200/m², according to Honely’s 2026 industry rates. Glazing is almost always the reason a “simple” extension ends up costing more than expected, and structural openings into the existing house are consistently flagged as one of the biggest budget swings in any project.
- Side return extensions generally have higher per m² costs due to site constraints and potential need for underpinning or extending existing party walls.
- Two-storey extensions typically provide better per square metre value by sharing foundations and roof across floors, lowering overall cost intensity.
- Wraparound extensions are more complex due to the junction of roof structures, with costs generally higher, approaching premium bands.
- Basement extensions are specialist projects with costs significantly higher than other extension types, requiring separate budgeting beyond typical per m² rates.
A worked example helps make this concrete. A 25m² single-storey rear extension at standard spec (£2,400/m²) comes to £60,000 for the shell. The same floor area as a side return, given the access constraints, could reach £75,000 before you have chosen a single tile.
What does the per-m² rate actually pay for?
Every quote breaks down into the same core elements, even if contractors present them differently. Understanding the split helps you see where value engineering will actually move the needle, rather than trimming costs on the parts that barely register.
- Foundations and groundworks: roughly £350 to £500 per m² of footprint, based on BestBuilders’ 2026 elemental breakdown. This is the figure most likely to escalate once trial holes reveal poor ground, tree roots, or the need for piled foundations. Our own work on foundation depth and ground conditions in Cambridge shows why a survey before you fix a budget matters more than any single line item.
- Shell and structure: walls, structural steels and insulation typically run £450 to £650 per m². Steel beam requirements for removing a load-bearing wall between the extension and existing house can add a meaningful chunk here.
- Roof and weatherproofing: usually £250 to £400 per m², rising sharply if you specify a flat roof with rooflights or a complex hip design over a standard pitch.
- Glazing and external doors: the single largest spec swing in the whole build. Bifolds, structural glass and rooflights can add tens of thousands to an otherwise modest extension.
- First-fix services, plastering and finishes: electrics, plumbing, plastering and decoration together usually make up 15% to 20% of the total.
Statistic callout: Foundations and groundworks alone can account for close to a fifth of total shell cost on a straightforward single-storey extension, and considerably more where ground conditions are poor, according to elemental cost data from BestBuilders.
Do London and the South East really cost 30% more?
Yes, broadly, and the uplift is consistent enough across sources to plan around it. National per-m² bands need a regional adjustment before they mean anything to a homeowner in London, Cambridge, or the wider South East.
- Labour rates for skilled trades run consistently higher in London and commuter-belt towns.
- Site access is more restricted, meaning smaller deliveries, more parking permits, and slower material movement.
- Party wall matters are more common and more complex in terraced and semi-detached streets, adding surveyor time and cost.
Applying a 20% to 30% uplift, as recommended in BestBuilders’ regional analysis, turns a standard-spec 20m² rear extension at £2,400/m² nationally into roughly £57,600 to £62,400 in London. A premium-spec version at £3,200/m² could reach £83,200 once the uplift is applied.
Pro Tip: Ask for quotes broken down by element rather than a single lump figure. Regional uplift rarely applies evenly across every trade, and a transparent breakdown shows you exactly where London pricing is biting hardest.

How do you turn a per-m² rate into a full project budget?
A realistic total needs more than area multiplied by rate. Work through this sequence for any project, and you will land close to the real number your contractor eventually invoices.
- Calculate the shell cost: floor area × chosen per-m² rate for your spec band and region.
- Add professional fees: architect (roughly 7% to 10% of build cost), structural engineer (£1,000 to £2,500 depending on complexity), and building control (£500 to £1,500).
- Add party wall costs where relevant: a surveyor and award typically cost £700 to £1,500 per neighbour if works fall under the Party Wall etc. Act.
- Apply VAT: standard rate on labour and materials in most homeowner contracts, per Gov.
- Add a contingency: 10% to 15% of the total build cost, higher on older properties or where groundworks are untested.
These worked totals assume standard-spec, single-storey rear extensions outside London, no unusual ground conditions, and one adjoining party wall. Change any of those assumptions and the number moves, sometimes substantially, which is exactly why the earlier per-type and regional sections matter before you commit to a figure.
What hidden costs catch homeowners out?
Most budget overruns trace back to a handful of predictable, recurring omissions rather than genuine surprises.
- Party wall surveyor and award: required whenever work falls within 3 to 6 metres of a neighbouring foundation, per Gov. Budget for this even if you expect a friendly neighbour.
- Site set-up, scaffolding and skips: often quoted separately from the main build, adding £1,500 to £4,000 depending on access and duration. Our site preparation checklist covers what typically gets missed at this stage.
- Utility connections and drainage: diverting an existing drain run or moving a soil stack can add several thousand pounds and is rarely priced into an early estimate.
- Contingency erosion: the 10% to 15% buffer disappears fast once ground conditions or party wall negotiations run long. Reducing scope, such as simplifying a roof lantern to standard rooflights, protects that buffer better than trimming finishes.
How long does a typical extension project take?
Programme and cost are tightly linked, since every extra week on site adds site set-up and management overhead.
- Pre-construction (design, planning, surveys): 2 to 4 months.
- Site enabling and foundations: 2 to 4 weeks, longer if ground conditions demand piling or extensive excavation.
- Structural shell: 6 to 10 weeks for a single-storey extension, 10 to 16 weeks for two-storey.
- Fit-out and finishes: 4 to 8 weeks depending on specification.
A small single-storey project can complete in 4 to 5 months from breaking ground; a large two-storey wraparound with a complex fit-out can run 8 to 10 months, excluding the pre-construction phase.
Do you need planning permission for an extension?
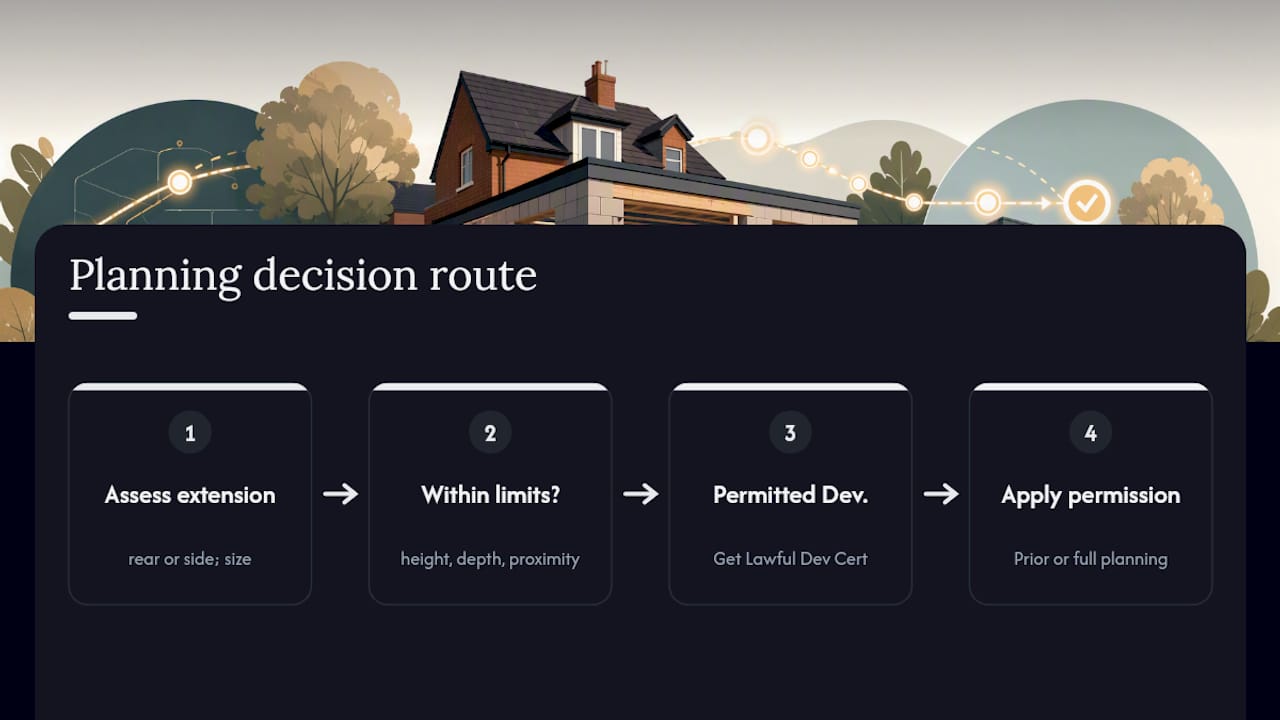
Many single-storey rear extensions fall under Permitted Development, subject to dimensional limits on height, depth and proximity to boundaries. Larger or side-facing extensions usually need prior approval or full planning permission. Even where Permitted Development applies, obtaining a Lawful Development Certificate is worth the modest fee, since it prevents disputes at sale and protects against retrospective enforcement. Check current planning application fees on gov.uk before assuming a project is free of statutory charges.
Why groundworks estimates vary so much between quotes
Ground condition surveys explain most of the gap between two contractors’ foundation quotes for the same extension. Clay, made ground, or a high water table can shift a foundation spec from strip footings to piled foundations overnight, and that decision alone can move the groundworks share of the budget substantially, as our foundation cost guide for Cambridge sets out in detail.
Strip-out and demolition sequencing also affects the overall programme and budget, particularly where an internal wall or old lean-to needs removing before groundworks can start.
- Commission a trial pit or borehole survey before fixing a foundation budget.
- Price drainage diversions and underpinning as separate specialist line items, not as part of the general groundworks allowance.
- Sequence strip-out ahead of the main contract to avoid delays once foundation work begins.
Where can you verify these figures yourself?
Cross-check pricing against gov.uk’s planning fee guidance, FMB’s cost resources, and GCS Contractors’ own groundworks and foundation pages for Cambridge-specific detail.
What the numbers actually tell you about budgeting an extension
The conventional advice to “just find a per-m² rate and multiply” is the single most misleading shortcut in this entire subject. A rate without a specification, a region and a ground condition assumption attached is close to meaningless, and the £1,700 spread between basic and premium bands proves it: the same 20m² extension can cost £34,000 or £70,000 depending on choices most homeowners haven’t made yet.
What the research actually supports is starting with the elemental breakdown, not the headline figure. Foundations, glazing and professional fees move a budget far more than most people expect, and groundworks are where estimates most often go wrong because they depend on ground conditions nobody can see from a brochure. If you take one thing from this guide, prioritise a proper ground survey before you fix any number in your head. Everything else, including the London uplift and the contingency percentage, is easier to plan around once that foundation figure is real rather than assumed.
— George
Get a groundworks quote built on real site data, not a national average
Gcscontractors turns the per-m² guesswork in this guide into a fixed, site-specific figure for your extension’s groundworks and foundations, the single line item most likely to blow a national estimate off course. Based in Cambridge and working across East Anglia, our teams price foundations, drainage, strip-out and site set-up against your actual ground conditions rather than a regional average, so the number you get is the number you build to.
That matters most for homeowners planning a side return or two-storey extension on clay or made ground, where a generic per-m² rate can be tens of thousands out. If your project involves an existing structure that needs clearing first, our strip-out and demolition guide explains how sequencing affects your overall timeline and budget. Get in touch with our groundworks and foundation services team for a site visit and a proper foundation quote before you commit to a headline budget.
Sources
- Single-storey extension costs: a practical guide for homeowners
- How much does an extension cost in the UK in 2026? | Honely
- Single Storey Extension Cost UK 2026 | RenoCalc
- Extension Cost Per M2 UK 2026: Element Price Breakdown
- Gov
- Gov
Recommended
If your works break open the highway and you have no statutory right to be there, you need a Section 50 licence under the New Roads and Street Works Act 1991. Works cannot legally start until the licence is signed, so the first move is simple: check whether your apparatus falls under statutory undertaker or SWA code powers, and if it does not, contact your local highway authority to begin the application.
TL;DR:
- The application process typically takes four to six weeks for a complete submission, with additional time for traffic orders or road closures, which can extend timelines further.
- Fees vary significantly across councils, ranging from around £530 to over £1,130, depending on the location and whether the work is retrospective or involves existing apparatus.
- Ensuring that contractors are NRSWA accredited, have valid insurance covering the full guarantee period, and provide quality documentation is essential to avoiding rejection or delays.
- Coordinating the licence, traffic management plan, and road space booking simultaneously accelerates project completion and reduces disruptions on site.
- Working without the proper licence or application delays can lead to penalties, high remediation costs, and even removal of unauthorized apparatus at the project owner’s expense.
Table of Contents
- What is a section 50 licence and when do you need one?
- What documents does a section 50 application need?
- How much does a section 50 licence cost?
- How long does a section 50 application take?
- What happens after the works are finished?
- Where do section 50 projects go wrong on site?
- How do you pick a contractor for section 50 works?
- What are the penalties for unauthorised street works?
- Delivering section 50 projects with minimal disruption
- How gcs contractors supports section 50 works
- Where to check the latest section 50 guidance
- Sources
What is a section 50 licence and when do you need one?
A Section 50 licence is a legal permit granted under NRSWA 1991 that lets someone without statutory undertaker powers place, retain, and maintain apparatus in a publicly maintained highway. “Apparatus” covers pipes, cables, and any fixed equipment laid under, on, or over the road; an “undertaker” is anyone with the legal right to install and manage it there.
You’ll typically need one for private drain connections crossing a footway, EV chargepoint connections feeding a driveway, new manholes, or private water and electricity supply lines running under a road or verge. Statutory undertakers (major utility companies) already hold blanket powers and don’t need this route. EV charge point operators working under the SWA code sit in a similar position. Everyone else, including most private contractors and property owners, applies for a Section 50 licence on a case-by-case basis. Getting this distinction wrong is the fastest way to submit the wrong application entirely.
What documents does a section 50 application need?
Councils reject incomplete applications more often than poor-quality ones, so treat the paperwork as seriously as the groundworks itself. Every application checklist follows roughly the same shape, though local authorities vary on formatting and supporting evidence.
- A site plan showing the exact location of proposed apparatus relative to the highway boundary
- An apparatus plan with dimensions, depth, and an “as-laid” drawing template ready for post-completion submission
- Public liability insurance evidence, typically between £5 million and £10 million cover
- NRSWA supervisor and operative cards confirming the workforce is accredited
- A traffic management plan and any STAT plans required for the road category
- Evidence of adoption agreements or wayleaves where the apparatus will eventually transfer to a statutory body
Councils sometimes request a bond or cash guarantee alongside these documents, held against the risk of defective reinstatement. It’s returned once the guarantee period ends and the final inspection passes.
Pro Tip: Get your insurance certificate dated to cover the full guarantee period, not just the construction phase. A policy that lapses before the two or three-year inspection window closes is one of the most common reasons applications stall at renewal.
How much does a section 50 licence cost?
Fees are set locally, so there’s no single national rate, and the variation catches out contractors who assume one council’s pricing applies everywhere. Buckinghamshire Council charges £1,130.43 for a standard application. BCP Council charges £780 for new apparatus and £530 where apparatus already exists. Durham, Liverpool, and Worcestershire all publish their own schedules, and none of them match exactly.
Retrospective applications typically cost significantly more than standard applications, reflecting additional enforcement and inspection work, reflecting the extra enforcement and inspection work involved in licensing works after the fact.
Budget for these elements separately:
- The base application fee, set by your specific local authority
- A bond or guarantee, held for the duration of the reinstatement warranty
- Possible penalty charges if work started before the licence was signed
- Any TTRO or road closure fees running alongside the licence
Never assume last year’s quote from one council applies to a different authority’s patch.
How long does a section 50 application take?
Processing takes a minimum of four to six weeks once you submit a complete application, according to Durham County Council. That’s the floor, not the average. Add a Temporary Traffic Regulation Order or road closure into the mix and lead times can stretch to multiple weeks, because TTRO notice periods run independently of the licence timeline.
- Pre-application check. Contact the highway authority to confirm whether Section 50 is the right route and flag any known constraints on the road.
- Submit the SWL form with the full document checklist attached, including insurance and NRSWA cards.
- Notify statutory undertakers operating in the same stretch of highway, since clashes with existing apparatus cause delays if caught late.
- Apply for TTRO or road closure permissions in parallel, not after the licence is granted.
- Wait for the signed licence before mobilising plant. Works cannot start legally beforehand.
- Submit a start notice, then a stop notice once works finish, triggering the registration clock.
Build your programme around the slowest permission, not the fastest.
What happens after the works are finished?
Signing the licence and reinstating the surface isn’t the end of your obligations. Worcestershire County Council requires registration of works, including “as-laid” drawings, within ten working days of completion. Miss that window and you risk a fixed penalty notice.
- Expect an inspection during the works themselves, another within six months, and further checks up to 24 or 36 months later for deeper excavations
- Guarantee periods run multiple years depending on how deep the apparatus sits
- Defects found during any inspection can trigger a remedial invoice, billed to you as the licence holder
- Where a statutory undertaker later adopts the apparatus, your ongoing licence obligations typically transfer with it
The registration deadline catches out more contractors than the actual reinstatement work does.
Where do section 50 projects go wrong on site?
Most delays and rejections trace back to the same handful of mistakes, and having watched enough of these projects unfold, the pattern rarely changes. Coordination failures top the list: applying for the Section 50 licence without booking the TTRO or road space alongside it means the licence sits ready while a separate permission holds everything up. Councils recommend booking road space early and quoting your licence reference when you do it.

Using a non-accredited contractor or presenting insurance that’s expired or under the £5 million threshold gets applications rejected outright, no negotiation. Bonds are the other blind spot. Contractors budget for the fee and forget the guarantee capital sits locked up for two or three years.
Pro Tip: Build a hold point into your programme before backfill, so a supervisor signs off apparatus depth and bedding against the approved plan. It’s far cheaper than a failed 24-month inspection.
How do you pick a contractor for section 50 works?
Choosing the wrong contractor is the single biggest risk factor in a Section 50 project, because the licence sits in your name even when someone else does the digging.
- Confirm NRSWA accreditation for every supervisor and operative named on site, not just the company as a whole
- Check public liability insurance covers the full works period plus the guarantee window, not just the installation date
- Ask for sample “as-laid” drawings and STAT plans from previous jobs to judge documentation standards
- Request RAMS and a written reinstatement guarantee before signing anything
- Treat vague warranty language, an expired NRSWA card, or insurance below £5 million as immediate red flags
A contractor with genuine groundworks and site preparation experience should produce this evidence without hesitation.
What are the penalties for unauthorised street works?
Working without a licence when one is required is a criminal offence under Section 51 of NRSWA, carrying potentially unlimited fines. Councils can remove unauthorised apparatus and reinstate the highway at your expense, on top of any fixed penalty notice issued for late registration or defective work. Retrospective licence fees run roughly double the standard rate, and remedial invoices for defective reinstatement stack on top. Unauthorised works rarely save money; they just move the cost further down the project timeline.
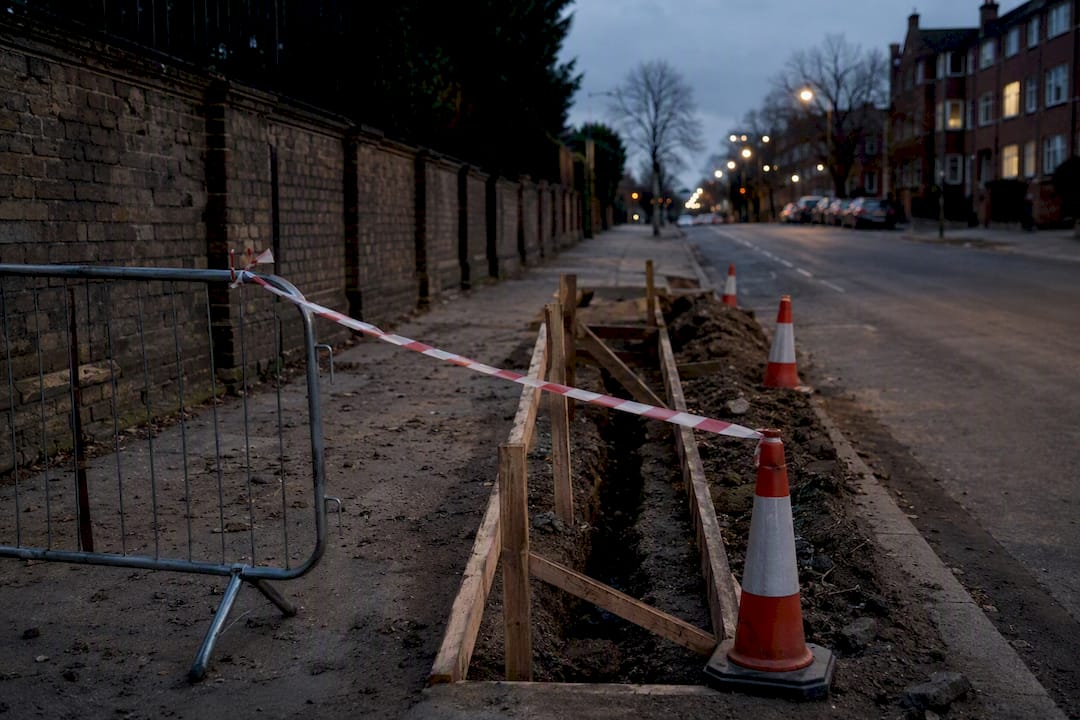
Delivering section 50 projects with minimal disruption
Section 50 projects succeed or fail on sequencing, not paperwork alone. The applications that move fastest are the ones where the traffic management plan, TTRO booking, and licence submission all start on the same day rather than in sequence. Specialist groundworks teams reduce reinstatement risk simply by getting compaction and bedding right the first time, because a failed inspection eighteen months later costs far more than an extra hour on site now.
— George
How gcs contractors supports section 50 works
Gcscontractors gives you a single point of accountability for the parts of a Section 50 project that go wrong most often: groundworks, reinstatement, drainage, and coordination with the highway authority’s timeline. Rather than juggling a licence application, a separate reinstatement contractor, and your own site management, you get one team that understands NRSWA obligations from the plan stage through to the final inspection.
Before you commission anyone for Section 50 works, ask for their NRSWA cards, current insurance certificate, and sample reinstatement records covering a completed guarantee period, not just a fresh job. Gcscontractors can supply all three alongside site management and roadworks delivery across Cambridge and East Anglia. If you’re weighing up a live application or a project already delayed by a failed inspection, get in touch through our groundworks and foundation services page for a quote.
Where to check the latest section 50 guidance
Start with GOV.UK’s issuing guidance for the legal framework, then check your specific council’s page, such as Liverpool’s application portal, for current fees and forms before submitting.
Sources
- Gov
- Apply for a Section 50 licence | Buckinghamshire Council
- Apply to install apparatus under a road, verge or pavement (Section 50 Licence) – Durham County Council
- Section 50 street works licence – Liverpool City Council
- The Section 50 licence – Worcestershire County Council
Recommended
You must give the local authority a section 80 demolition notice under the Building Act 1984 before demolishing all or a substantial part of a building. Do not start works until you receive a Section 81 counter-notice or six weeks have passed, whichever comes first. You must also notify adjacent occupiers and utility suppliers, and submit a site plan and supporting documents with the form.
TL;DR:
- A Section 80 demolition notice must be submitted to the local authority before starting any substantial demolition work, with delays or incorrect submissions risking legal penalties.
- Most councils require detailed plans, asbestos surveys, a method statement, and proof of notifications sent to adjacent occupiers and utility providers before approval.
- The six-week waiting period starts once the notice is received, but conditions attached to a Section 81 counter-notice may require upfront compliance with asbestos removal, site hoarding, and restricted hours.
- Fees vary between authorities, typically from £235 to £440, and starting work without a valid notice or before the expiry period can lead to fines and enforcement actions.
- Engaging experienced demolition contractors to handle paperwork, surveys, and logistics reduces delays and ensures full compliance from the outset.
Table of Contents
- What is a Section 80 notice and when does it apply?
- Who must submit the notice and when?
- How to prepare and submit a Section 80 notice
- What happens after you submit the notice?
- Practical compliance checklist before demolition starts
- Fees, penalties and mistakes that cost you time
- A contractor’s view on avoiding delays
- Get Section 80 compliance handled by experienced demolition contractors
- Where to find the official forms and guidance
- Sources
What is a Section 80 notice and when does it apply?
A section 80 demolition notice is the statutory mechanism under the Building Act 1984, Section 80 that requires anyone intending to demolish a building, or a substantial part of one, to inform their local authority before work begins. The legislation is deliberately blunt on timing: you cannot start until you’ve received a Section 81 notice from the council or the statutory period has run out.
Not every demolition job triggers the requirement. Common exemptions include:
- Structures with a volume of 50 cubic metres or less
- Internal demolition works inside a building that stays occupied throughout
- Certain agricultural buildings and minor outbuildings, such as small sheds or greenhouses
- Some temporary or ancillary structures, depending on the council’s interpretation
Section 80 sits entirely separate from planning permission. Demolishing a building without listed status or conservation area protection may not need planning consent at all, but it will almost always need a Section 80 notice if it exceeds the exemption thresholds. Confusing the two is one of the most common mistakes property owners make, and it’s worth checking party wall and planning obligations separately, since neither process replaces the other.
Who must submit the notice and when?
Responsibility for the notice usually falls to whoever is legally instructing the demolition, though the exact party can vary by project structure. Get this wrong and you risk an invalid submission just as your contractor is ready to mobilise.
- The building owner, their appointed agent, or the principal contractor can submit the notice, but the person named must have the authority to confirm the details are accurate.
- Submit the notice sufficiently before your intended start date to allow for the statutory waiting period. Some councils publish stricter internal processing targets, so check the local Hammersmith & Fulham demolition notice guidance or your own authority’s equivalent page for specifics.
- Expect councils to ask for an Ordnance Survey map or block plan at a standard scale, a proposed start date, and full contractor details before they’ll register the notice as complete.
Fees vary between authorities, and a notice submitted without the correct plan or contractor information typically gets bounced back for correction, which reduces the time available before demolition can start.
How to prepare and submit a Section 80 notice
Getting the paperwork right the first time saves weeks. Councils reject a surprising number of notices simply because a required attachment is missing, so work through this checklist methodically rather than treating the form as a formality.
- Complete the local authority’s Section 80 form. Every council has its own version, but most follow a similar structure, requesting a description of the works and confirmation of ownership or agency. Bradford Council’s demolition notice form is a useful example of the standard fields you’ll encounter.
- Attach an Ordnance Survey map or block plan at 1:1250 scale. This needs to clearly show the building’s boundary and its relationship to neighbouring plots.
- Commission an asbestos survey before you submit. Most councils, including Leicester City Council, explicitly require this alongside a demolition method statement, and HSE treats asbestos exposure as one of the highest-risk elements of any demolition project.
- Write a demolition method statement. This should cover sequencing, plant to be used, structural stability during works, and how you’ll manage dust and debris. A properly structured demolition method statement makes the difference between a smooth Building Control review and a stalled one.
- Notify adjacent occupiers and statutory undertakers. Gas and electricity suppliers need advance warning if there’s any chance of live services being affected, and you should keep proof of every notification sent.
- Pay the council fee and submit the pack. Most authorities now accept submissions through an online Building Control portal, though some still require a printed form and postal delivery.
- Build in contingency time. Assume the council may respond with conditions attached under Section 81, and don’t schedule your contractor’s mobilisation for the exact day the six weeks expires.
Pro Tip: Keep every notification as a dated record, whether that’s a recorded delivery receipt, a scanned letter, or a timestamped email. Building Control officers commonly ask to see this proof at their first site visit, and a missing paper trail can hold up an otherwise compliant project.
What happens after you submit the notice?
Once your section 80 demolition notice lands with the council, the six-week statutory period starts running, though the authority may respond much sooner. Local authority teams generally treat the counter-notice as an active safety control rather than a rubber stamp, and it’s common for conditions to arrive well before the six weeks are up.
Typical conditions attached to a Section 81 counter-notice include:
- Asbestos removal completed and verified before any structural work begins
- Site hoarding erected to a specified height along public-facing boundaries
- Dust suppression measures, particularly for sites near residential properties
- Restricted working hours to limit noise disruption to neighbours
- Traffic management plans where demolition affects a public highway
If you disagree with a condition, most councils allow informal discussion with the Building Control officer before you escalate further, and it’s usually faster to resolve disputes this way than through a formal appeal. Ignoring a counter-notice or starting work before the six weeks elapse without one exposes you to enforcement action, and it can jeopardise insurance cover if an incident occurs on an unauthorised site.
Practical compliance checklist before demolition starts
Section 80 covers the legal notification, but councils and inspectors expect a lot more on site before they’re satisfied a project is safely run. Building this into your pre-start planning avoids the scramble that often happens when a Building Control officer turns up unannounced.
- Confirm principal contractor duties are allocated correctly under CDM 2015, including who holds responsibility for the construction phase plan
- Check public liability and contractor’s all-risks insurance is current and covers demolition specifically, not just general building work
- Erect compliant site hoarding before any plant arrives, particularly where the site borders a public footway
- Secure highways permissions in advance if you need a road closure, a skip licence, or a temporary crossing for heavy plant
- Confirm your waste carrier holds a valid licence and that all demolition waste is documented through proper transfer notes; a partner resource on legal waste disposal covers the licensing requirements in more depth
- Rule out any on-site burning of demolition arisings, which most councils prohibit outright under local environmental controls
Pro Tip: Treat your asbestos survey and method statement as living documents. If the demolition sequence changes once work starts, whether due to an unexpected structural finding or a revised traffic management need, update the paperwork and keep Building Control informed rather than pressing ahead on the original version.
Fees, penalties and mistakes that cost you time
Council charges for processing a section 80 demolition notice vary by authority, with example forms showing minimum fees in the region of £235 to £440. Always check the fee schedule on your own council’s form rather than assuming a figure from a neighbouring authority.
Starting demolition without a valid notice, or before the statutory period expires, is a criminal offence that can result in summary conviction and a fine. Beyond the legal exposure, the most frequent pitfalls are avoidable: assuming Section 80 substitutes for planning permission, failing to keep records of adjacent occupier notifications, and setting a start date that doesn’t allow for a Section 81 counter-notice to land in time.
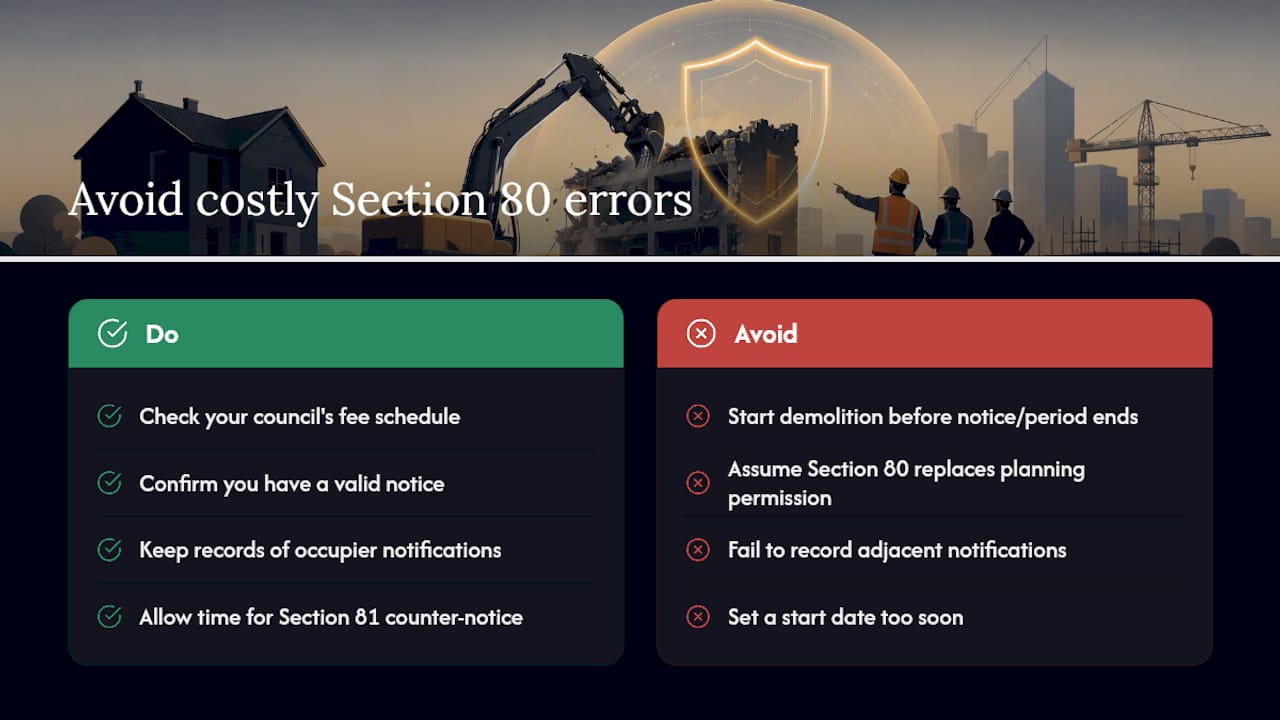
A contractor’s view on avoiding delays
Every experienced demolition team learns the same lesson eventually: the six-week period is a planning gate, not a deadline to race towards. Building likely Section 81 conditions, asbestos clearance, hoarding, restricted hours, into the programme from day one avoids the scramble that happens when a council response lands three days before mobilisation.
The projects that run smoothly are the ones where the method statement accounts for realistic sequencing, notifications to utilities are documented properly, and surveys are commissioned early enough that results don’t hold up the submission itself. Co-ordinating those elements together, rather than treating each as a separate task, is what actually keeps a demolition programme on schedule.
— George
Get Section 80 compliance handled by experienced demolition contractors
Preparing a compliant section 80 demolition notice is straightforward on paper, but the surveys, method statements, and site logistics behind it are where projects usually slip. Gcscontractors handles the full sequence, from pre-demolition and asbestos surveys through to method statement preparation, site hoarding, and demolition delivery, so your notice goes in complete the first time and your programme doesn’t stall waiting on a Section 81 response.
Working with a contractor who has managed dozens of these notices across Cambridge and East Anglia means fewer surprises: conditions get anticipated rather than reacted to, and notifications to adjacent occupiers and utility suppliers are documented properly from the outset. If you’re planning a demolition project and want the regulatory and programme risk taken off your plate, get in touch with Gcscontractors and request a breakdown of your demolition sequence before you set a start date.
Where to find the official forms and guidance
Start with Building Act 1984, Section 80 and 81 for the statutory text, then check your local Building Control page for council-specific forms and fees. HSE’s demolition safety guidance covers the risk assessment expectations in detail.
Sources
- Building Act 1984, Section 80
- Demolition notices | London Borough of Hammersmith & Fulham
- Notice of demolition (Section 80) — Bradford Council (form PDF)
- Notice of demolition works — Leicester City Council (form PDF)
- Demolition — HSE
Recommended
UK law recognises two formal asbestos survey types under HSG264: the management survey and the refurbishment and demolition (R&D) survey. A management survey suits buildings in normal occupation and feeds your asbestos register. An R&D survey is mandatory before any intrusive refurbishment or demolition work begins, because it involves fully invasive access that a management survey never attempts.
TL;DR:
- A management survey is suitable for buildings in normal occupation but becomes inadequate once structural work or demolition is planned.
- R&D surveys are fully intrusive and destructive, requiring area vacating and covering the entire building or specific zones depending on project scope.
- Ensuring survey competence involves UKAS accreditation, following HSG264 methodology, and samples analyzed by accredited labs, especially for demolition work.
- Accurate commissioning requires clear scope definition, including boundaries, access, and reporting expectations, with costs and timescales varying by survey type.
- Post-survey, updating the asbestos register and management plan is essential for safe contractor briefing, work planning, and maintaining compliance records.
Table of Contents
- What is a management survey and when do you need one?
- What does a refurbishment and demolition survey actually involve?
- When is each survey legally required?
- How do you check a surveyor is actually competent?
- Commissioning a survey: scope, access, sampling and timescales
- What happens after the survey report lands?
- Planning surveys into the demolition sequence
- Planning demolition or refurbishment? Start with the right survey
- Where to check the detail yourself
- Sources
What is a management survey and when do you need one?
A management survey identifies asbestos-containing materials (ACMs) likely to be disturbed during everyday occupation, cleaning, and routine maintenance. It is the baseline survey almost every non-domestic building in the UK needs, and it directly supports the statutory premises management obligations that apply to anyone responsible for maintaining commercial premises.
The scope is deliberately non-intrusive. Surveyors inspect accessible areas, assess the condition of any ACMs found, and take samples only where visual identification is not conclusive. HSENI notes that sampling is common practice in both survey types, so do not assume a management survey means no lab work at all, as detailed in its asbestos surveys guidance.
A management survey typically produces:
- An asbestos register listing every identified or presumed ACM by location
- Condition assessments flagging materials that need monitoring or immediate attention
- A management plan setting out control measures and review intervals
- Recommendations on which areas need a follow-up R&D survey before any future works
If your building is staying in occupation with no structural changes planned, a management survey is usually sufficient. The moment you plan to break into walls, lift flooring, or demolish anything, that survey stops being adequate on its own.
What does a refurbishment and demolition survey actually involve?
An R&D survey is a different exercise entirely. Rather than checking what is visible, surveyors locate and describe every ACM that could exist within the fabric of the area being worked on, or the entire building if demolition is planned. That means opening up cavities, lifting floor coverings, inspecting ceiling voids and service ducts, and taking destructive samples from places a management survey would never touch.

Scope matters enormously here. UKATA’s HSG264 guidance warns that confusion often arises from the outdated “Type 1/2/3” terminology; the modern framework has just two survey types, and the brief given to the surveyor must state precisely what work is planned, as set out in HSG264’s survey methodology. A refurbishment-limited R&D survey covers only the floor or zone due for alteration. A demolition-scoped R&D survey must explicitly cover the whole structure, a distinction detailed by AsbestosSurveyFinder’s guide to R&D surveys. A survey scoped to one floor does not legally authorise demolishing the entire building.
Because the inspection is destructive, areas usually need to be vacated while work takes place, often under containment, and the surveyor should issue a fit-for-reoccupation confirmation once sampling and inspection are complete.
| Feature | Management survey | R&D survey |
|---|---|---|
| Intrusiveness | Non-intrusive, visual | Fully intrusive, destructive |
| Typical trigger | Normal occupation, maintenance | Planned refurbishment or demolition |
| Access needed | Accessible areas only | Cavities, voids, service runs |
| Occupancy during survey | Building stays occupied | Areas usually vacated |
| Key output | Asbestos register, management plan | Detailed ACM location report, reoccupation sign-off |
When is each survey legally required?
The Control of Asbestos Regulations 2012 places a legal duty on anyone responsible for non-domestic premises to manage the risk from asbestos, and HSE’s own guidance is explicit that a management survey is the minimum expectation for occupied buildings. Where refurbishment or demolition is planned, HSE guidance treats an R&D survey as a precondition, not an option. You cannot rely on an old management survey to authorise intrusive works.
If your project falls under CDM 2015, there is a further obligation: pre-construction information, including any relevant asbestos survey findings, must be passed to designers and principal contractors before design and construction decisions are finalised.
Your immediate duties as dutyholder are straightforward in principle, harder in practice:
- Brief the surveyor accurately on the intended works
- Commission only competent surveyors and accredited laboratories
- Keep written records of every survey, register update, and management plan revision
- Update pre-construction information whenever new survey data emerges
How do you check a surveyor is actually competent?
Hiring on price alone is one of the most common ways dutyholders end up with an inadequate survey, and it is the client, not the surveyor, who carries the legal exposure when things go wrong. A handful of checks reduce that risk considerably.
- Confirm the surveying firm holds UKAS accreditation for the survey type you need.
- Ask whether their methodology follows HSG264, and request evidence of comparable R&D or demolition-scoped projects.
- Check that samples are analysed by a UKAS-accredited laboratory, not an in-house or unaccredited facility.
- Request an example report and confirm it includes location plans, sample results, and clear recommendations.
- Verify professional indemnity insurance and ask how chain-of-custody is documented for samples.
- For demolition work, ask directly whether the surveyor has experience with destructive inspection, since not every management surveyor is comfortable opening structural voids.
Pro Tip: Ask to see a redacted sample report before you commission anything. A vague register with “presumed ACM, further investigation recommended” scattered through every line is a sign the previous survey was rushed, and you will likely need a second one anyway.
Commissioning a survey: scope, access, sampling and timescales
The brief you give a surveyor decides the quality of everything that follows. State plainly whether the building is remaining in general use, undergoing refurbishment in a defined area, or being demolished in full. Ambiguity here is exactly what leads to a survey being scoped too narrowly for the actual works, forcing a second visit later.
A commissioning brief should cover:
- The intended works and their exact boundaries, including any excluded areas
- Access and vacating arrangements, particularly for R&D surveys requiring destructive inspection
- Reporting requirements: location plans, sample results, the asbestos register, and prioritised recommendations
- A realistic allowance for laboratory turnaround, which can add several working days to the programme
Timescales and costs vary sharply between the two survey types. A management survey on a modest commercial unit is usually quicker and cheaper than an R&D survey on the same building, because R&D work needs more site time, more samples, and more lab analysis. AsbestosSurveyFinder’s 2026 cost guidance sets out representative price ranges by property size, and it is worth requesting a fixed quote against your specific brief rather than a generic per-square-metre estimate.
What happens after the survey report lands?
The register and management plan are not filing-cabinet documents. Use them to brief contractors before any maintenance work, and update the management plan every time a condition changes or an area is remediated.
Where ACMs are confirmed, removal method depends on the material: some work needs a licensed contractor, while lower-risk materials can sometimes be handled by a trained non-licensed operative. Either way, removal needs to sit explicitly in your project programme, not be squeezed in afterwards.
- Update CDM pre-construction information the moment new survey findings arrive
- Brief every contractor working near identified ACMs before they start
- Insist on formal fit-for-reoccupation confirmation after any intrusive R&D survey
- Retain every version of the register and management plan as your compliance record
Planning surveys into the demolition sequence
Commission surveys early. Every demolition programme I have seen slip has the same root cause: an R&D survey ordered after the schedule was already set, rather than before pricing began.
Match scope to the actual works. A refurbishment-limited survey is cheaper but only covers what it says on the brief, so specify full demolition scope the moment that is genuinely the plan. Contractors who plan destructive inspection properly, sequencing access and containment before sampling starts, get through this stage with far less disruption than teams treating it as an afterthought bolted onto week one.
— George
Planning demolition or refurbishment? Start with the right survey
Getting the survey brief right the first time saves weeks later. Gcscontractors works on strip-out, demolition, and enabling works across Cambridge and East Anglia, and one thing we see repeatedly is projects delayed because an R&D survey was scoped too narrowly for the works actually planned. We help clients translate survey findings, whether that is a register flagging ACMs in a ceiling void or a full demolition-scoped report, into a safe, sequenced programme that does not stall halfway through.
If you are planning demolition or major refurbishment and need the survey outputs turned into a workable site sequence, our demolition sequence breakdown sets out how we integrate pre-demolition checks into the programme. Get in touch to talk through your project and get a firm quote for the enabling works that follow your survey.
Where to check the detail yourself
For the legal framework, read HSE’s guidance on arranging surveys. For methodology, consult HSG264. For commissioning and reporting standards, see the RICS professional standard.

This article is general information, not a substitute for advice from a qualified doctor. Consult a qualified healthcare professional about your own circumstances before acting on anything here.
Sources
- The duty to manage asbestos in buildings: Arrange an asbestos survey – HSE
- HSG264 — Asbestos: The survey guide (UKATA / HSE guidance)
- Asbestos professional standard (RICS 2023)
- Refurbishment and Demolition Asbestos Survey (R&D): Requirements, Costs & Process (2026) | AsbestosSurveyFinder
Recommended
A waste transfer note is a legally required written record for every transfer of non-hazardous business waste in the UK, made mandatory under Duty of Care and Section 34 of the Environmental Protection Act 1990. If your waste is hazardous, a WTN will not do. You need a consignment note instead, and the two documents are not interchangeable.
For everything else, here’s what to do right now:
- Download the GOV.UK duty of care template (form WMC2A) or build a document with the same fields.
- Get both transferor and transferee to sign before the waste leaves site.
- Keep a copy, on paper or digitally, for at least two years.
Pro Tip: If you run repeat collections with the same carrier, ask about a season ticket rather than signing a fresh WTN every time a skip leaves site.
Key Takeaways
Every non-hazardous waste transfer in the UK needs a signed transfer note containing an accurate EWC code, quantity, and both parties’ details, retained for two years.
| Point | Details |
|---|---|
| WTN is mandatory | Required under Duty of Care for every non-hazardous business waste transfer, not optional paperwork. |
| Get the EWC code right | Generic descriptions are the most common reason transfer notes fail scrutiny during inspections. |
| Retention is two years | Keep records, paper or digital, and be able to produce them within seven days if requested. |
| Season tickets need schedules | Any change of carrier, waste type, or location invalidates the ticket immediately. |
| Electronic signatures are valid | Digital WTNs are fully acceptable provided the signature is authenticated and logically linked. |
Table of Contents
- Waste transfer note requirements: the fields you cannot skip
- How to fill in a waste transfer note step by step
- When does a hazardous waste consignment note apply instead?
- What records must you keep, and for how long?
- Building a site-ready waste transfer note checklist
- Official templates and legislation worth bookmarking
- Why contractors get this wrong more than they should
- Sources
Waste transfer note requirements: the fields you cannot skip
Under regulation 35 of The Waste (England and Wales) Regulations 2011, a transfer note isn’t valid unless it identifies the waste correctly, states how much of it there was, and confirms who handed it to whom. Get one field wrong and the whole document loses its value as evidence of Duty of Care.
Here’s what a compliant WTN needs, field by field:
- Waste description and EWC code — a precise European Waste Catalogue code, not a vague label like “mixed debris”. Natural Resources Wales is blunt about this: inaccurate coding is one of the most common reasons transfer notes fail scrutiny.
- Quantity and container type — tonnes, cubic metres, number of skips, or sacks. A note reading “1 x 8 yard skip, mixed inert rubble” is far more defensible than “some waste”.
- Transferor and transferee details — full names, addresses, SIC code, and the carrier’s waste permit or registration number.
- Date, place of transfer, and both signatures, plus a declaration that the waste hierarchy has been applied before disposal.
- Season ticket schedule, if you’re using an annual note, listing every individual transfer it covers.
Electronic signatures are fine under the regulations, provided they’re properly authenticated and logically tied to the document. There’s no requirement to print anything.
How to fill in a waste transfer note step by step
Filling one in properly takes minutes once you’ve done it a few times. Rushing it is how errors creep in.
- Start from a template that mirrors the GOV.UK layout. Trying to invent your own field structure is how sites end up missing something Regulation 35 actually requires.
- Enter transferor and transferee details first — names, addresses, and permit numbers, before anything about the waste itself.
- Confirm the EWC code. Use regulator guidance or the NetRegs waste classification tool. Demolition arisings commonly fall under codes like 17 01 07 (mixed concrete, bricks, tiles) or 17 09 04 (mixed construction and demolition waste). If you’re unsure which applies, our guide to types of construction waste breaks down common categories.
- Record quantity and container format consistently. For example: “1 x 40 yard skip, approximately 6 tonnes, EWC 17 01 07.” Vague entries are the first thing an inspector will query.
- Sign, or apply an authenticated electronic signature, and file the record immediately rather than leaving it in someone’s inbox.
- If using a season ticket, log the transfer on the accompanying schedule the moment it happens, not at month end.
Pro Tip: Photograph the loaded skip alongside the signed note. It costs nothing and gives you a second layer of evidence if a description is ever disputed.
When does a hazardous waste consignment note apply instead?
Hazardous waste, such as asbestos, contaminated soils, or certain fluorescent tubes, is never covered by a standard WTN. It requires a consignment note, which carries stricter tracking obligations and typically involves the Environment Agency’s electronic system rather than a simple paper form.
A few complications come up repeatedly on construction sites:
- Brokers and dealers: if a broker arranges collection on your behalf, their details still need to appear on the WTN. You remain responsible for checking they’re properly registered.
- Mixed or uncertain loads: if you’re not sure whether material should be reclassified (rubble contaminated with plasterboard, for instance), stop and get it assessed rather than guessing a code.
- Season ticket limits: any change of carrier, waste type, or collection address invalidates the ticket immediately. You’ll need a fresh note.
What records must you keep, and for how long?
You must retain WTNs, or equivalent electronic records, for at least two years, and produce them promptly if a regulator asks. For season tickets, that two-year clock starts from the date of the last transfer on the schedule, not the date the ticket was issued.
Electronic storage is entirely acceptable, provided the record is complete and retrievable, and any electronic signature is properly authenticated.
The most common audit failings on construction sites are surprisingly basic:
- Missing or generic EWC codes that don’t match what was actually removed.
- No schedule kept alongside a season ticket, so individual transfers can’t be traced.
- Records split across paper and someone’s phone, with no single point of retrieval.
Poor documentation exposes both the producer and the carrier to enforcement action, and it undermines your ability to demonstrate that the waste hierarchy was genuinely applied.
Building a site-ready waste transfer note checklist
Most contractors don’t fail on the law itself. They fail on consistency, one site keeps tidy digital records, another leaves signed notes in a site cabin drawer for months.
A workable pre-transfer checklist covers five things: confirm the carrier’s registration or permit number, describe the waste accurately with its EWC code, record quantity and container type, get both signatures, and file the note the same day.
Two examples make this concrete. A single skip removal from a strip-out job needs one WTN, completed on the day the skip leaves. An annual season ticket covering weekly groundworks spoil collections needs one master note plus a running schedule, updated after every single lift, not retrospectively.
For recordkeeping, decide early who owns the record, site manager, office administrator, or contracts team, and store digital WTNs alongside weighbridge tickets or invoicing data so everything about a transfer sits in one place.
- Verify the carrier before waste leaves site.
- Confirm EWC code and quantity match what’s actually loaded.
- Get signatures and file the note within 24 hours.
Site teams handling regular waste removal also benefit from a working understanding of correct classification and disposal routes; our guide to recycling demolition waste covers how accurate documentation supports better reuse decisions. For staff who need formal training in this area, the certificate in removing non-hazardous wastes for construction is worth considering.
Official templates and legislation worth bookmarking
Keep these close: the GOV.UK waste transfer note template, regulation 35 of the 2011 Regulations, Natural Resources Wales completion guidance, and HSE’s HSG47 guidance for excavation safety alongside waste handling.

Why contractors get this wrong more than they should
The conventional advice on waste transfer notes treats them as an administrative afterthought, something you fill in once the skip’s already gone. That’s backwards. A WTN written from memory two days later is where most of the coding errors and vague descriptions creep in, and it’s exactly what an enforcement officer notices first.
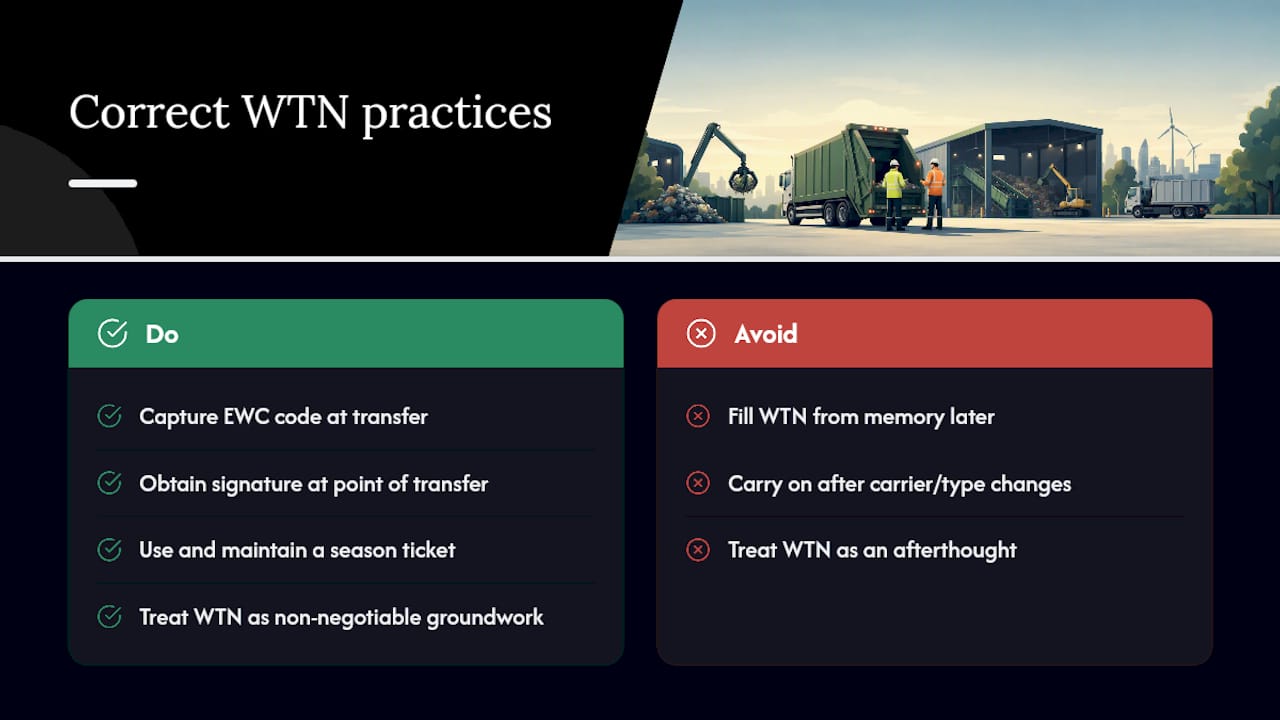
What’s underrated is the season ticket. Most sites either avoid it entirely, because the paperwork sounds complicated, or misuse it by carrying on regardless when a carrier or waste type changes. Used properly, with a maintained schedule, it saves real administrative time on repeat groundworks or strip-out jobs. Used carelessly, it’s a liability dressed up as convenience.
If you take one thing from this: get the EWC code and the signature captured at the point of transfer, not afterwards. Everything else, retention, storage, formatting, is manageable once that habit is in place. Our own site teams treat it as non-negotiable groundwork, not paperwork, on every job we run, from strip-out projects through to full groundworks packages.
— George
Sources
- Gov
- The Waste (England and Wales) Regulations 2011 — regulation 35
- Completing waste transfer notes — Natural Resources Wales
Recommended
Type 1 sub base (MOT Type 1) is a crushed, graded 0–40mm aggregate produced to Clause 803 of the Specification for Highway Works, designed to compact into a dense, load-bearing layer beneath driveways, roads, and hardstandings. UK suppliers sell it loose by the tonne, in 800–850kg bulk bags, or occasionally in smaller trade bags for patch repairs.
A rough working figure helps before you order anything: Type 1 typically has a common bulk density figure used for estimation once compacted.
- Supplied loose by the tonne for large jobs delivered by tipper
- Bulk bags (800–850kg) suit driveways and smaller domestic projects
- Trade bags available for repairs and small patching work
Key Takeaways
Type 1 sub base performs reliably when its grading is verified, its depth matches the load above it, and compaction happens in thin, checked layers rather than one thick dump.
| Point | Details |
|---|---|
| Confirm the standard | Check the supplier’s grading certificate against SHW Clause 803 before ordering. |
| Calculate with 2.1 t/m³ | Use this working density and add 5–10% contingency for wastage and compaction. |
| Match depth to use | Allow 75–100mm for patios, 100–150mm for driveways, 150–250mm for car parks. |
| Compact in layers | Lay in 75–100mm lifts and compact each pass before adding the next. |
| Rethink permeable surfaces | Choose a free-draining aggregate instead of Type 1 under artificial grass. |
Table of Contents
- What is Type 1 sub base and the UK technical standard?
- Where is Type 1 sub base used on a project?
- Should you choose primary or recycled aggregate?
- How much Type 1 sub base do you actually need?
- What does correct installation involve?
- Is Type 1 sub base suitable under artificial grass?
- How do you buy Type 1 sub base and what should you check first?
- What do contractors actually check on site?
- Get your groundworks specified and installed correctly
- Editorial take: what the spec sheets don’t tell you
- Sources
What is Type 1 sub base and the UK technical standard?
Clause 803 of the Specification for Highway Works sets the formal definition. It requires a crushed, angular aggregate graded within a specific envelope, typically referenced as 31.5/0 or described commercially as 0–40mm. That grading matters more than most buyers realise: the mix of particle sizes, from dust up to 40mm stones, is what allows the material to lock together under compaction rather than shifting underfoot.
Rounded, uncrushed gravel fails this test, which is why genuine Type 1 always comes from crushing quarried rock or approved recycled sources. Suppliers such as Holcim publish technical data sheets confirming grading and intended use, and it’s worth checking one before committing to an order. Poor fines content or the wrong source material increases frost susceptibility and undermines long-term stability, especially under driveways that see repeated freeze-thaw cycles.
Where is Type 1 sub base used on a project?
Type 1 sits beneath most surfaces that carry vehicle or pedestrian loads across the UK, from garden patios to full-scale car parks. The right compacted depth depends entirely on what sits above it and what will drive or walk over it.
- Patios and light pedestrian areas: 75–100mm compacted depth is usually sufficient.
- Domestic driveways: 100–150mm, depending on subgrade strength and vehicle weight.
- Car parks and light commercial areas: 150–250mm compacted, built up in layers.
- Heavily loaded or soft-ground sites: seek an engineer’s specification rather than relying on standard depth tables.
If the subgrade is peaty, waterlogged, or shows signs of significant clay movement, standard Type 1 depths won’t compensate for a weak foundation.
Should you choose primary or recycled aggregate?
Limestone, granite, and gritstone dominate the primary Type 1 market, and each behaves slightly differently underfoot. Limestone compacts well and is widely available across much of England, though it can be softer and more prone to breakdown under sustained heavy traffic than granite or gritstone, which offer harder, more angular particles and better long-term durability.

Recycled aggregate, crushed from demolition concrete and masonry, offers a genuine cost and sustainability advantage. The catch is quality control: reputable producers cap recycled asphalt content, often below 5%, to avoid softening and rutting over time, a point PavingExpert makes clear when discussing blended sources. Ask any supplier offering recycled Type 1 for confirmation of source material and asphalt content before you order, particularly for driveways expected to last decades.
How much Type 1 sub base do you actually need?
Working out quantities comes down to one figure: bulk density. Most suppliers and PavingExpert use 2.1 tonnes per cubic metre as the standard working estimate, though moisture content and compaction can shift that slightly toward 2.0 or 2.2.

Pro Tip: Order slightly more than your calculation suggests. A 5–10% contingency covers compaction losses, uneven excavation, and the inevitable spoil left over from levelling.
Coverage works out as follows, based on PavingExpert’s figures:
- One tonne covers roughly 5 m² at 100mm compacted depth.
- One tonne covers roughly 3.5 m² at 150mm compacted depth.
- An 800–850kg bulk bag typically covers 3–5 m², depending on depth.
Take a 40m² domestic driveway at 120mm compacted depth as a worked example. That’s roughly 4.8 tonnes of loose Type 1, or around six bulk bags once you allow for wastage and uneven ground.
What does correct installation involve?
Good material poorly laid still fails. Start by excavating to remove topsoil, organic matter, and any soft or contaminated ground, testing the exposed subgrade before you place a single barrow-load of aggregate. A subgrade that flexes visibly underfoot needs either additional depth or a geotextile layer before Type 1 goes down.
- Lay Type 1 in lifts of 75–100mm rather than dumping the full depth at once.
- Compact each layer thoroughly using a vibrating plate compactor for smaller areas or a roller for larger surfaces.
- Check levels and falls after each pass, not just at the end.
- Fit a geotextile membrane where separation from the subgrade is needed, or a woven type where reinforcement of a weak subgrade is the priority.
The choice between woven and nonwoven geotextile isn’t cosmetic. Woven geotextiles provide reinforcement and low elongation, useful over soft or variable ground, while nonwoven types suit filtration and drainage where separating soil from aggregate is the main concern.
Pro Tip: Always ask your supplier for the technical data sheet before delivery, not after. Verifying grading and source material on paper is far easier than arguing about a load that’s already on site.
Is Type 1 sub base suitable under artificial grass?
Not ideally, and this catches a lot of buyers out. Type 1 compacts to a dense, low-permeability layer by design, which is exactly what you want under a driveway but works against you under artificial turf, where surface water needs to drain away rather than pool.
For permeable surfacing or artificial grass, a free-draining sub-base is the better choice, sometimes paired with a designed soakaway or drainage channel at the perimeter. Where Type 1 has already been laid, adding a geotextile with dedicated drainage runs can mitigate the problem, though switching to a free-draining aggregate from the outset is the cleaner fix, as both PavingExpert and Armstrongs note.
How do you buy Type 1 sub base and what should you check first?
Bulk bags at 800–850kg suit driveways and smaller domestic jobs where a tipper delivery isn’t practical. Loose tonnage makes more sense for larger sites, car parks, or anywhere a grab lorry can offload directly where it’s needed.
Before placing an order, run through a short checklist with the supplier:
- Ask for the current grading certificate or technical data sheet.
- Confirm whether the material is primary quarried aggregate or contains recycled content, and at what percentage.
- Check minimum order quantities and whether part-loads carry a surcharge.
- Confirm delivery method: tipper access, grab offload, or bag drop, and whether your site can accommodate it.
Prices vary by region and source material, so treat any online figure as a starting point rather than a quote. For detailed advice on preparing the site before material arrives, our groundworks guide for Cambridge covers site setup in more depth. If you’re weighing material choice against a full resurfacing project, our driveway resurfacing guide sets out layer depths and surface options side by side.
What do contractors actually check on site?
Experienced groundworks teams don’t just order material and lay it. They confirm subgrade strength before committing to a spec, checking for soft spots that a standard depth table won’t cover. They request supplier documentation, including grading certificates and TDS, and keep it on file for building control or client sign-off.
When a site shows unusual loading, poor drainage, or unstable ground, that’s the point to call a structural or civil engineer rather than push ahead with textbook depths. Getting foundations right underneath any sub-base matters just as much as the aggregate itself, a principle covered in our foundations best practice guide.
For readers weighing up specification detail against contract compliance, it’s also worth understanding how specification sections are structured on larger projects, since Type 1 requirements often sit within a wider Section 01 document.
Get your groundworks specified and installed correctly
Getting the sub-base right is only half the job. Site clearance, subgrade preparation, drainage, and compaction all need to happen in the right order and to the right standard, which is where a contractor with direct groundworks experience earns their fee. GCS Contractors delivers groundworks and foundation work across Cambridge and East Anglia, from initial site setup through to compacted sub-base and surfacing.
If you’re planning a driveway, hardstanding, or commercial groundworks package and want the specification checked before material arrives on site, our groundworks and foundation services page sets out what’s involved and how to get a project scoped properly.
Editorial take: what the spec sheets don’t tell you
Most Type 1 guidance online repeats the same density figure and coverage table without addressing why so many driveways fail early. It’s rarely the aggregate. It’s the subgrade underneath it, skipped compaction passes, or a bulk bag ordered on guesswork rather than a proper calculation.
The conventional advice treats Type 1 as a commodity: order by weight, tip it, compact it, done. That’s backwards. The grading certificate and source material matter more than the price per tonne, because a poorly graded or asphalt-heavy recycled load will underperform no matter how well you compact it. I’d prioritise the supplier conversation over the online calculator every time: ask for the TDS, confirm the source, and only then work out tonnage.
The permeability issue under artificial grass is the clearest example of good material used wrongly. Type 1 does exactly what Clause 803 asks of it. The mistake is assuming one aggregate suits every surface above it.
— George
Sources
- Sub-base Aggregates | PavingExpert
- Holcim technical data sheet: Type 1 sub-base (TDS)
- MOT Type 1 sub-base: What it is, uses & how much you need | Armstrongs Group
- Travis Perkins MOT Type 1 Sub Base Bulk Bag product page
Recommended
- Underpinning Cost per Metre UK 2026: The Complete Buying Guide – GCS Contractors Ltd
- Reinforced Concrete Base for Garden Office Stevenage: Professional Guide 2026 – GCS Contractors Ltd
- How Ground Conditions Affect Foundation Costs in the UK: A 2026 Guide – GCS Contractors Ltd
- Trench Fill Foundation Specialists Peterborough: Expert Substructure Solutions – GCS Contractors Ltd