How to lay foundations: a step-by-step guide
Laying foundations is defined as the process of creating a stable, load-bearing base for a structure through site clearance, excavation, reinforcement, concrete pouring, and curing. Get this phase wrong and everything built above it is compromised. The sequential steps of clearing, excavating, reinforcing, pouring, and backfilling are not optional stages you can reorder or skip. This guide walks you through each phase with the precision and compliance awareness that UK Building Control expects, whether you are building a garden room, an extension, or a small outbuilding.
What tools, materials, and permits do you need before starting?
Preparation is the difference between a foundation that lasts decades and one that cracks within a few years. Before any soil is disturbed, you need the right equipment, the correct materials, and legal permission to proceed.
Essential tools for foundation work:
- Measuring tapes, builder’s line, and profile boards for accurate set-out
- Spirit levels and a laser level or optical level for formation checks
- Excavator or hand tools (spades, mattocks) depending on trench depth
- Concrete mixer or ready-mix delivery for larger pours
- Internal poker vibrator for trench fills deeper than 600 mm
- Tamper or plate compactor for sub-base and backfill compaction
- PPE: hard hat, steel-toecap boots, gloves, high-visibility vest, and eye protection
Key materials required:
- Structural concrete (typically C25/30 for strip foundations)
- Steel reinforcement bars (rebar) and plastic spacers for correct cover
- Blinding concrete (C10 lean mix) to create a clean working surface
- 1200-gauge polythene damp-proof membrane (DPM)
- Compactable sub-base material such as Type 1 MOT
Before breaking ground, submit a Building Regulations application to your local authority. Building Control inspection before the concrete pour is a legal requirement in the UK, not a formality. Notify your inspector at least 24 hours in advance, though 48 hours is strongly preferred by most authorities.
Pro Tip: Contact your local Building Control officer early in the design stage. They will often advise on soil conditions, minimum depths, and any local ground movement risks before you commit to a foundation design.
How do you prepare the site and excavate footings correctly?
Site preparation is where foundation quality is either won or lost. Site set-out accuracy governs the final geometry of your foundation and directly affects settlement risk. Rushing this stage costs far more to correct later than the time saved upfront.
Follow these steps in order:
- Clear the site. Remove all vegetation, topsoil, tree roots, and any made ground or fill material. Organic material beneath a foundation causes differential settlement as it decomposes.
- Establish datum points and set out the building lines. Use profile boards and builder’s line to mark the exact position and width of each footing. Double-check diagonals to confirm square corners.
- Excavate to formation level. Footings must be dug below the frost line and sized to suit soil conditions and structural load. In the UK, typical depths range from 450 mm in stable, non-clay soils to well over 1 metre in shrinkable clay or where tree roots are present.
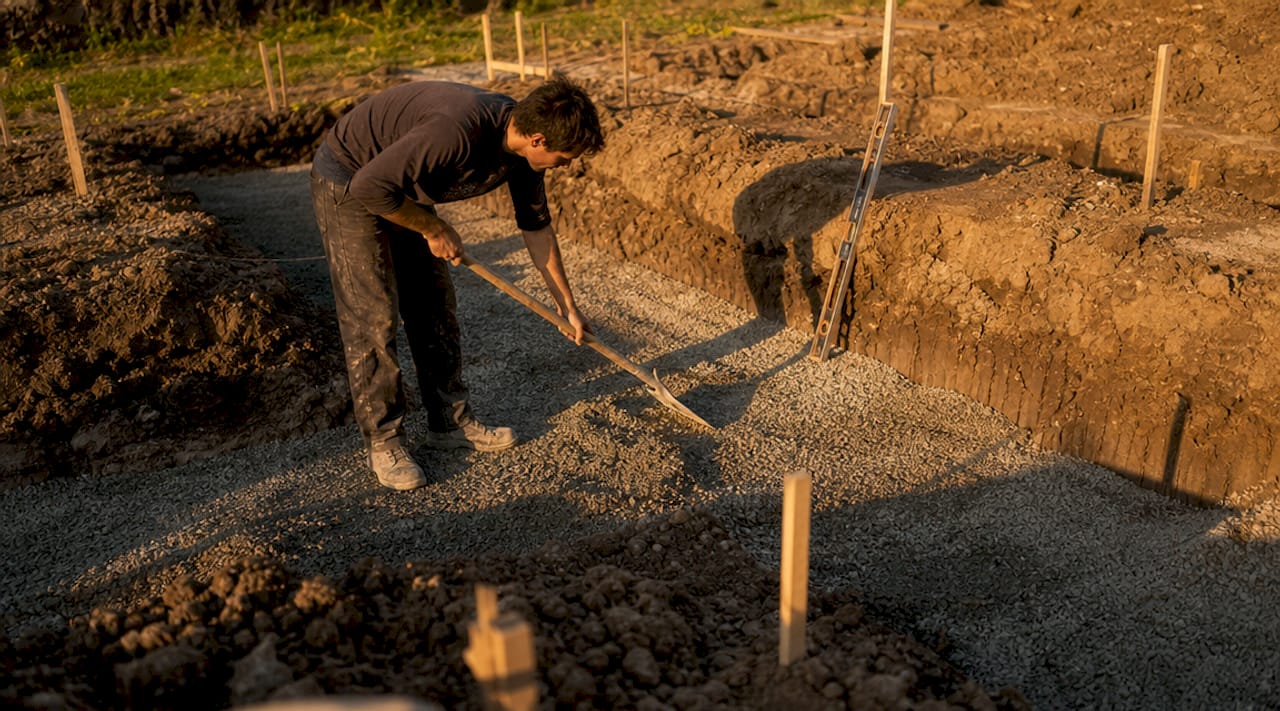
- Leave a hand-trim allowance. Machine excavation should stop 50 to 75 mm above the design formation level. Hand-trim the final layer to avoid disturbing the subgrade. Over-excavation forces you to use engineered fill, which adds cost and programme time.
- Compact the subgrade. Once at formation level, compact the exposed subgrade using a plate compactor. Compaction to 95 to 98% Proctor density is the standard target, with layer lifts no greater than 200 mm.
- Place blinding concrete. Pour a 50 mm layer of C10 lean-mix blinding over the compacted formation. This protects the subgrade from disturbance and gives you a clean, level surface for reinforcement placement.
- Call for Building Control inspection. Do not proceed to reinforcement or concrete until your inspector has signed off the excavation. This is a legal hold point.
“Foundation depth and type are site-specific, driven by geotechnical and structural requirements rather than generic rules, especially in UK clay soils.” — Foundation Requirements, ConcreteMath
For UK projects, Approved Document A Table 10 provides prescriptive minimum foundation widths for domestic masonry by ground type and loading. Always check whether your soil type and proximity to trees require a deeper, engineered solution beyond these prescriptive values. Review the civil engineering considerations for site prep if you are unsure which approach applies to your ground conditions.
What are the best reinforcement and concreting techniques for durable foundations?
Reinforcement and concrete placement are the technical heart of foundation construction. Errors here are invisible once the concrete sets, but their consequences are permanent.
Reinforcement placement:
- Position steel bars at the correct depth using plastic spacers for cover. Never hold bars in position by hand during the pour. Spacers maintain the minimum 40 to 75 mm cover required to protect steel from corrosion in below-ground concrete.
- Lap bars by the specified overlap length (typically 40 times the bar diameter) and tie laps securely with binding wire.
- Check that no reinforcement touches the blinding or the trench sides before pouring begins.
Concrete pouring:
- Pour concrete continuously to avoid cold joints. A cold joint forms when a previous pour has partially set before fresh concrete is placed against it, creating a plane of weakness.
- For trench fills deeper than 600 mm, use an internal poker vibrator throughout the pour. Vibration consolidates the mix, eliminates air voids, and prevents honeycombing. This is not optional for deep pours.
- Set up and brace formwork to withstand the full head pressure of wet concrete. Inadequate bracing causes blowouts and wasted material.
- Screed and level the top surface to the correct finished level, checking with a spirit level or laser as you go.
| Stage | Key requirement | Common defect if skipped |
|---|---|---|
| Reinforcement cover | Plastic spacers, min. 40 mm cover | Corrosion and spalling |
| Concrete vibration | Poker vibrator for pours over 600 mm | Honeycombing and voids |
| Continuous pour | No interruption until section complete | Cold joints and cracking |
| Formwork bracing | Braced to resist full concrete head | Blowouts and misalignment |
| Curing | Minimum 7 days, keep moist | Strength loss and surface cracking |
Quality control tests such as slump tests and cube tests confirm that the concrete delivered matches the specified mix. Request these from your ready-mix supplier on larger pours.
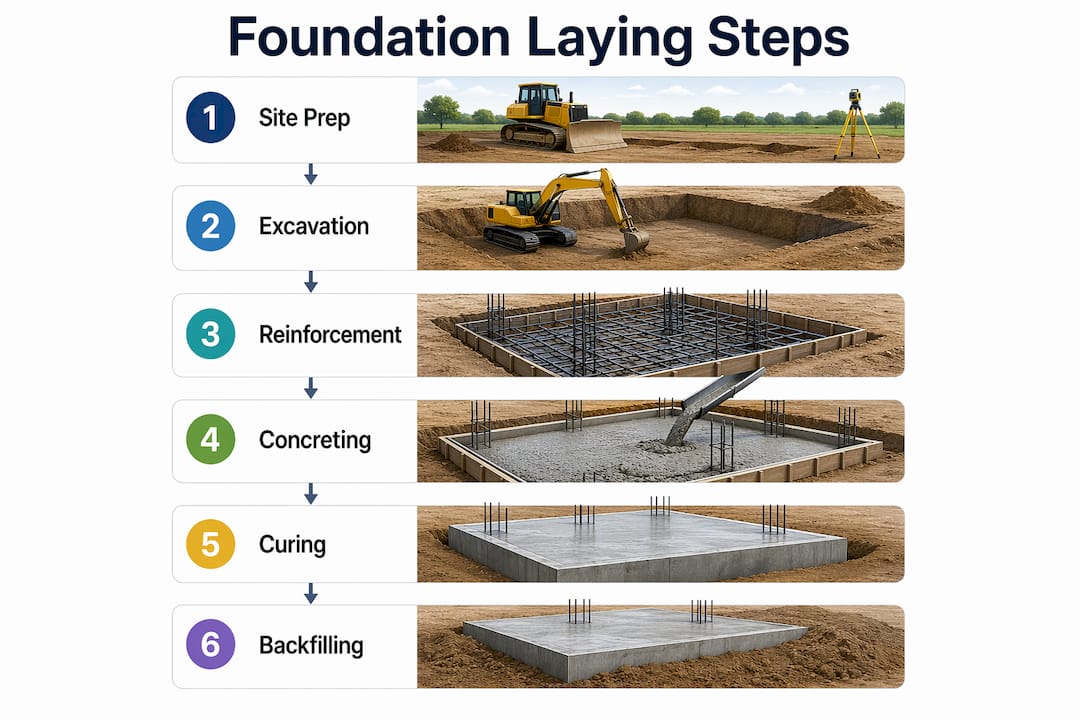
Curing is the stage most DIYers underestimate. Cover the finished surface with polythene sheeting or hessian and keep it moist for a minimum of seven days. Concrete gains approximately 70% of its 28-day strength in the first seven days, but only if moisture is retained during that period.
Pro Tip: In cold weather, protect fresh concrete from frost for at least 48 hours using insulating blankets. Concrete that freezes before it reaches sufficient strength will never recover its design strength, regardless of how long it cures afterwards.
How to backfill and complete foundation work for lasting strength
Once the concrete has cured and Building Control has inspected the foundation, backfilling can begin. This stage is straightforward but must be done carefully to avoid undermining the work already completed.
Backfilling best practice:
- Backfill in compacted layers no greater than 200 mm. Placing fill in thick, uncompacted lifts causes settlement that can crack floor slabs and damage wall ties above.
- Use granular, free-draining material where possible. Avoid placing clay-rich or organic spoil directly against the foundation.
- Install drainage as required before backfilling. French drains or perforated land drains positioned at the base of the foundation wall protect against hydrostatic pressure build-up.
- Apply a waterproof membrane to the external face of the foundation wall before backfilling. A 1200-gauge polythene DPM lapped and taped to the wall DPC prevents moisture ingress to the living area.
For ground-bearing oversite slabs, the minimum specification is 100 mm of structural concrete over a compacted sub-base, with the DPM positioned above the sub-base and below the slab. Lap joints must be a minimum of 300 mm and taped to maintain continuity.
Pro Tip: Always photograph each stage of the foundation build before covering it. If a dispute arises with Building Control or a future buyer’s surveyor, photographic evidence of correct construction is your best defence.
What common mistakes should you avoid when laying foundations?
Even experienced builders make errors during foundation work. Knowing the most frequent mistakes in advance lets you build quality checks into your process.
- Over-excavation. Digging below the design formation level disturbs the natural bearing capacity of the subgrade. The fix is engineered fill, which is expensive and time-consuming. Always hand-trim the final layer.
- Insufficient compaction. Poorly compacted sub-base or backfill settles under load. Use a plate compactor and work in 200 mm layers without exception.
- Incorrect reinforcement cover. Steel placed too close to the concrete surface corrodes and causes spalling within years. Use the correct plastic spacers and check cover before every pour.
- Cold joints from interrupted pours. If you cannot complete a continuous pour in one session, plan a construction joint at a structurally acceptable location and prepare the surface correctly before resuming.
- Skipping Building Control inspections. Pouring concrete before your inspector signs off the excavation is a serious compliance failure. It can result in enforcement notices requiring you to expose and re-inspect the foundation at your own cost.
- Ignoring soil-specific risks. Shrinkable clay soils in the UK require deeper foundations and careful attention to tree root influence zones. Frost action in shallow soils can heave foundations in cold winters. Always check local ground conditions before finalising your design.
Key takeaways
Laying foundations correctly requires precise excavation to the right depth, continuous concrete placement with vibration, and mandatory Building Control sign-off before any pour begins.
| Point | Details |
|---|---|
| Excavate to the correct depth | Depths range from 450 mm to over 1 m depending on soil type, frost risk, and tree proximity. |
| Compact in layers | Subgrade and backfill must be compacted in 200 mm lifts to prevent settlement. |
| Use plastic spacers for rebar | Spacers maintain minimum cover and protect steel from corrosion in below-ground concrete. |
| Vibrate deep pours | An internal poker vibrator is required for any trench fill deeper than 600 mm to prevent honeycombing. |
| Notify Building Control | Give at least 24 hours notice before the concrete pour; 48 hours is strongly preferred by most authorities. |
What I have learned from years of foundation work
After working on groundworks across a wide range of residential and commercial projects, the single biggest lesson I can share is this: patience during the curing phase is not optional. I have seen DIYers strip formwork after 24 hours and load the foundation within days, only to find cracking appear months later. Seven days of proper curing is the minimum. In cold or wet conditions, extend that period and protect the surface.
The second thing I would tell any aspiring builder is to invest time in the set-out before a single spade goes in the ground. I have seen projects where a 20 mm error in the profile board position caused a footing to be in the wrong place entirely, requiring expensive remedial work. Check your diagonals twice. Check your levels three times. The concrete does not forgive you for rushing the survey.
Working with Building Control inspectors is not adversarial. In my experience, most inspectors are genuinely helpful if you communicate clearly and give them proper notice. Treat them as a quality check, not an obstacle. They have seen every failure mode that exists in foundation construction, and their sign-off protects you legally for the life of the building.
Finally, if you encounter unexpected ground conditions, such as soft spots, made ground, or a high water table, stop and get professional advice before proceeding. The cost of a geotechnical assessment is trivial compared to the cost of a failed foundation. For complex ground conditions, the groundworks safety guidance from experienced contractors is worth reviewing before you commit to a design.
— George
How Gcscontractors supports your foundation project
Whether you are tackling a small extension or a more complex residential build, having the right groundworks partner makes every phase more manageable.

Gcscontractors delivers professional site preparation, excavation, and foundation construction services across the UK, with a strong focus on Building Regulations compliance and quality workmanship. The team handles everything from initial site clearance and drainage installation through to foundation pours and oversite slab construction. If your project involves challenging ground conditions, live environments, or tight inspection timescales, Gcscontractors has the experience to keep things on track. Explore the compliant site preparation services or visit the Gcscontractors homepage to discuss your project requirements directly.
FAQ
How deep should foundations be for a UK house extension?
Foundation depth in the UK typically ranges from 450 mm in stable, non-clay soils to well over 1 metre in shrinkable clay or where trees are nearby. Your Building Control officer will confirm the required depth based on your specific ground conditions.
What concrete mix is used for strip foundations?
C25/30 structural concrete is the standard specification for domestic strip foundations in the UK. Always request a slump test and cube test from your ready-mix supplier to confirm the mix meets the design specification.
Do I need Building Control approval before pouring foundations?
Yes. Building Control inspection before the concrete pour is a legal requirement under UK Building Regulations. Notify your inspector at least 24 hours in advance, and do not pour until written or verbal approval is given.
How long should concrete foundations cure before loading?
Concrete foundations require a minimum of seven days of moist curing before formwork is removed or loading begins. Full 28-day strength is needed before significant structural loads are applied above.
What is blinding concrete and why is it used?
Blinding concrete is a thin layer of C10 lean-mix concrete, typically 50 mm thick, placed over the compacted formation. It protects the subgrade from disturbance, provides a clean working surface, and gives a stable base for reinforcement placement.