Site setup explained: the UK construction guide
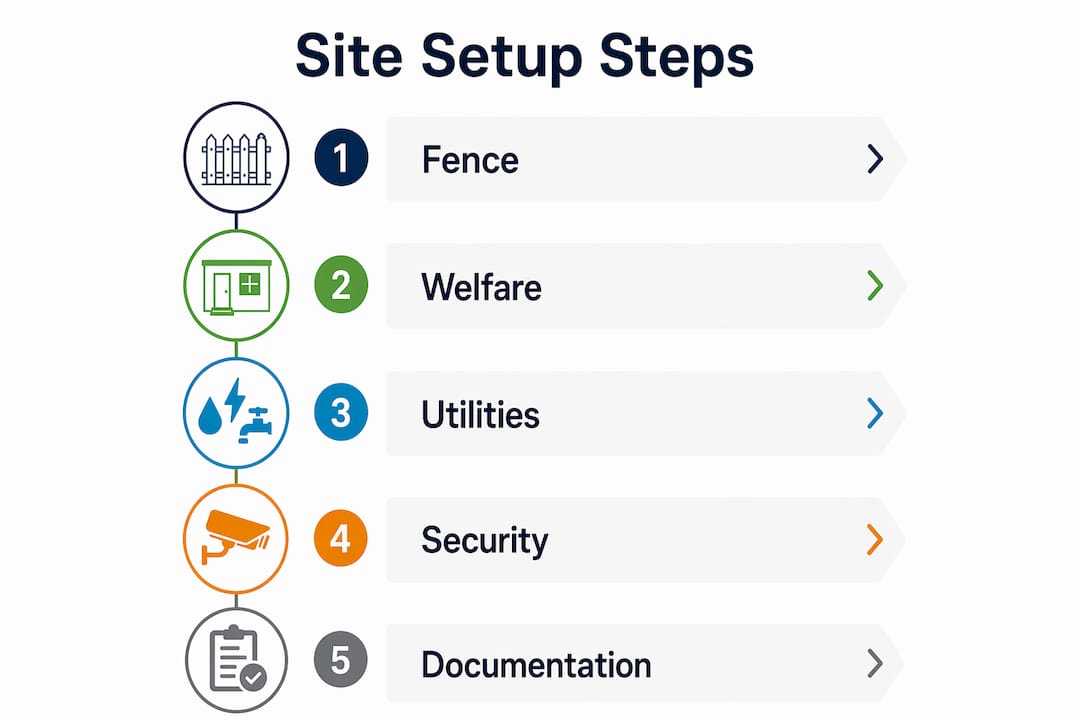
Site setup is the preparatory process that transforms an empty plot into a safe, compliant, and operational construction site. Under the CDM Regulations 2015, it is not optional groundwork — it is the legal and practical foundation on which every subsequent activity depends. On day one, that means five things are in place before anyone starts work: a defined perimeter, welfare facilities, temporary utilities, access control, and site documentation.
Core elements to establish from the outset:
- Perimeter control — temporary fencing or solid hoarding to define the legal boundary
- Welfare facilities — toilets, handwashing stations, rest area, and drinking water
- Temporary utilities — power, lighting, water supply, and drainage connections
- Access and security — controlled gate entry, signage, and a site register
- Documentation — construction phase plan, risk assessments and method statements (RAMS), and induction records
Pro Tip: Before the first delivery arrives, walk the site and fix your gate position permanently. Moving a gate after fencing is installed costs time and money, and it forces every subsequent layout decision to be revisited.
Table of Contents
- What does a site setup checklist cover?
- How do you plan a site layout before works begin?
- Arranging temporary power, lighting, water, and drainage
- What access control and security measures does a site need?
- What documentation must be in the site office from day one?
- Day-zero to week-one: a practical timeline and cost guide
- What should a site plan include?
- How Gcscontractors approaches site setup: a UK case example
- Key takeaways
- What experienced site managers have learnt about setup
- Gcscontractors: site setup and enabling works for UK construction projects
- Useful sources and further reading
What does a site setup checklist cover?
A well-structured checklist is the fastest way to confirm nothing critical has been missed before works begin. The table below covers the core items, their compliance status under UK law, and the relevant authority.
| Item | Requirement | Legal / Guidance Reference |
|---|---|---|
| Perimeter fencing or hoarding | Mandatory before any works begin | CDM 2015 / HSE |
| Welfare: toilets and handwash | Mandatory; handwash adjacent to toilets | CDM 2015 welfare guidance |
| Drinking water and rest area | Mandatory | CDM 2015 |
| Temporary power and lighting | Required for safe working and site office | HSE guidance |
| Drainage and waste management | Required from day one | CDM 2015 |
| Site signage (H&S law poster) | Mandatory display in site office | HSE law poster |
| First aid kit and fire extinguisher | Mandatory | HSE first aid guidance |
| Accident book | Mandatory on site | HSE accident book |
| Site register and induction records | Mandatory; audited by HSE | CDM 2015 |
| Construction phase plan | Mandatory before works start | CDM 2015 |
| RAMS for setup activities | Required before high-risk tasks | CDM 2015 |
| Waste skips and storage zones | Required; positioned at setup | Local authority / CDM |
For a self-build or smaller commercial project, the site preparation checklist published by Gcscontractors covers the same items in a format you can print and keep in the site office.
Fencing vs hoarding: which is right for your site?
| Option | Best used when | Typical specification |
|---|---|---|
| Temporary mesh fencing (Heras) | Lower-risk sites, rural or low-footfall locations | panels, anti-lift feet, privacy screens optional |
| Solid timber hoarding | Urban sites, public footpaths, high-security needs | Minimum height, braced uprights, signage boards |
| Acoustic hoarding | Sites adjacent to residential or sensitive uses | Lined panels; reduces noise transmission significantly |
Solid hoarding is the standard choice for any site bordering a public pavement. Temporary mesh fencing is proportionate for rural groundworks where public access is not a concern. The professional guide to construction site hoarding covers specification and compliance in detail.
How do you plan a site layout before works begin?
A well-drawn site layout produced during the initial walk-through is one of the most valuable tools for cost control and safety. CDM 2015 guidance makes clear that mapping boundaries and designating activity zones at mobilisation reduces mid-project relocations and the cost overruns that follow. The sequence below reflects the dependencies that matter most.
- Walk the boundary — confirm the legal extent of the site against drawings; mark any discrepancies before fencing goes up.
- Mark existing services — locate underground utilities (gas, electric, water, telecoms) using service drawings and, where necessary, a CAT scan. Never assume.
- Identify hazards — note ground conditions, overhead lines, adjacent structures, and any restricted zones before allocating space.
- Allocate activity zones — working area, material storage, plant parking, welfare compound, and waste skip positions. Keep pedestrian and vehicle routes separate from the outset.
- Fix gate locations — delivery gates and pedestrian access points must be confirmed before fencing is installed; changing them later forces a cascade of layout revisions.
- Connect welfare to utilities — position the welfare compound close to the temporary water supply and drainage point to avoid long pipe runs.
- Sketch and version the layout — produce a simple annotated sketch, date it, and keep it in the site office. Update it when anything changes.
A misplaced skip or delivery gate is the most common source of compounding costs on small to medium projects. Moving a skip after the first pour, for example, typically requires a crane or telehandler booking, a revised traffic management plan, and lost working time. Getting placement right on day zero costs nothing.
Pro Tip: Sketch the layout on site, not in the office. Walking the ground with a tape measure and a printed OS plan reveals constraints — a manhole cover, a low branch, a neighbour’s gate — that never appear on drawings.

Arranging temporary power, lighting, water, and drainage
Temporary utilities must be sequenced carefully because welfare and safe working cannot begin without them. CDM 2015 requires adequate welfare from day one, which means utilities are not a week-two task.
Priority order for temporary services:
- Power — site office, lighting, and tool supply. Arrange a temporary supply agreement with the Distribution Network Operator (DNO) well in advance; lead times can be several weeks.
- Lighting — all working areas and access routes must be adequately lit, particularly for early starts or winter projects. Temporary tower lights are the standard solution.
- Water — welfare handwashing, drinking water, and any concrete or mortar mixing. Position the supply point close to the welfare compound.
- Drainage — foul drainage for portable toilets and surface water management for the compound area. Confirm the discharge point before welfare is connected.
Safety requirements for temporary electrics:
- All temporary electrical installations must be designed and installed by a qualified electrician.
- Residual current devices (RCDs) are mandatory on all temporary site supplies.
- Cable runs must be secured, protected from vehicle damage, and clearly marked.
- HSE guidance on temporary electrics sets out the inspection and testing regime that applies from day one.
Handwashing stations must be positioned directly adjacent to toilet clusters — this is a practical hygiene requirement under CDM 2015 welfare provisions, not merely good practice. Sites that separate sanitation from handwash facilities routinely fail welfare inspections.

What access control and security measures does a site need?
Perimeter fencing establishes the boundary; access control determines who crosses it and when. The two work together, and both must be operational before the first delivery or subcontractor arrives.
Core security layers to install at setup:
- Lockable gates on all vehicle and pedestrian access points
- Site signage: “Authorised Personnel Only”, PPE requirements, emergency contact numbers
- Perimeter lighting at gates and welfare areas (particularly for early-morning or late-finish projects)
- CCTV or monitored alarm system for overnight security on higher-value sites
Access control options, matched to project scale:
- Manual sign-in sheet — proportionate for small sites with a single access point and a site manager present at all times
- Staffed gate — appropriate for medium to large sites with multiple subcontractors and frequent deliveries
- Electronic turnstile or fob system — suited to long-duration projects or sites with sensitive security requirements
Site induction: what to cover and record at first entry:
- Site rules, PPE requirements, and prohibited areas
- Emergency arrangements: assembly point location, first aid contact, and fire extinguisher positions
- Hazard briefing specific to the current phase of works
- Confirmation of induction signed by the worker and filed in the site office
Emergency arrangements must be established on day one without exception. That means a designated assembly point (marked and communicated), a stocked first aid kit, at least one fire extinguisher appropriate to the site’s fire risk, and a posted emergency contact list. HSE guidance sets out the minimum first aid provision for construction sites.
What documentation must be in the site office from day one?
CDM 2015 is unambiguous: health and safety documentation must be present and accessible at the site office from the moment works begin. Absence of records during an HSE audit or a safety advisor’s visit is treated as evidence that procedures were not followed, regardless of what actually happened on site.
Mandatory documents to have ready before day one:
- Construction phase plan (reviewed and signed off before works start)
- Risk assessments and method statements (RAMS) for all setup activities
- Site induction records for every worker who has entered the site
- Health and safety law poster displayed prominently in the site office
- Site register (daily record of all personnel on site)
- Training records and relevant certificates (CSCS cards, first aid, plant operator licences)
- Accident book available and accessible at all times
Organising the site office for audit readiness:
- Use a dedicated noticeboard for the H&S law poster, emergency contacts, and current RAMS
- Maintain a physical file for induction records, sorted by date
- Keep digital backups of all critical documents — a cloud folder accessible to the project manager and principal contractor
- Version-control the construction phase plan; each revision should be dated and the previous version archived
For high-risk activities — hot works, confined space entry, or work near live services — a permit-to-work system must be integrated into site setup routines from the outset. Permits are not retrospective documents; they must be issued before the activity begins.
Pro Tip: Use construction safety software to log inductions and safety meetings digitally. Auditors increasingly expect electronic records, and a searchable log is far faster to produce under inspection than a paper folder.
Well-organised records are evidence of an active safety culture. They keep teams aligned when new personnel arrive and reduce friction during handovers between subcontractors.
Day-zero to week-one: a practical timeline and cost guide
Mobilising a site without a clear sequence is one of the most reliable ways to create early cost overruns. The timeline below reflects the dependencies that experienced site managers follow.
- Day zero (pre-mobilisation): Confirm all permits (skip licence, scaffold licence if required, hoarding licence for public footpath). Notify the local authority and adjacent neighbours. Arrange temporary utility connections with the DNO and water supplier.
- Day one (morning): Deliver and install perimeter fencing or hoarding. Fix gate positions permanently. Install site signage.
- Day one (afternoon): Connect temporary power and lighting. Position welfare compound (toilets, handwash, rest cabin). Confirm drainage connection or arrange pump-out schedule for portable toilets.
- Day two: Deliver site office cabin. Set up noticeboard, file system, and safety documentation. Conduct first inductions for all personnel on site.
- Days three to five: Establish material storage zones and waste skip positions. Confirm vehicle and pedestrian routes with all subcontractors. Complete site layout sketch and file it.
- Week one: First material deliveries. Plant mobilisation. Begin groundworks or enabling works as programmed.
Key cost considerations during setup:
- Hire vs buy: for projects under six months, hiring fencing, welfare units, and cabins is almost always more cost-effective than purchasing.
- Bundling fencing, portable toilets, and waste services under a single provider simplifies scheduling and avoids conflicting delivery windows.
- Gate and skip placement decisions made on day zero avoid costly relocations later in the programme.
- Specialist subcontractors for groundworks, drainage, and civils should be confirmed and sequenced before mobilisation, not after. Late engagement affects early cashflow and can delay welfare connection.
For a structured breakdown of the 8 essential steps for compliant UK projects, Gcscontractors has published a practical guide covering sequencing and compliance in detail.
What should a site plan include?
A site plan is a working document, not a filing exercise. CDM 2015 guidance and site layout plan standards both confirm that a usable plan must show existing and proposed features, scaled dimensions, and labelled zones so that contractors, inspectors, and local authority officers can all read it without ambiguity.
Map elements to include on every site plan:
- Property lines and legal site boundary
- Scale bar and north point
- Existing structures, services, and topography notes
- Proposed structures and temporary works
- Vehicle access routes and turning areas
- Pedestrian routes and segregation points
- Material storage zones and plant parking areas
- Welfare compound location
- Waste skip positions
- Signage and assembly point locations
- Exclusion zones (overhead lines, buried services, structural risk areas)
Annotation guidance:
- Label depths for any excavation or drainage works
- Mark lifting points and crane radii where plant is programmed
- Note temporary works (shoring, propping) with reference to the relevant method statement
- Include a revision box: plan number, date, and author
The site plan must link directly to the RAMS and the construction phase plan. When a method statement references a zone or route, the plan should show it. Inspectors cross-reference these documents; inconsistencies between them are a common audit finding.
Pro Tip: Keep the site plan live. Print a fresh copy each time a zone changes, date it, and replace the version on the site office noticeboard. A plan that reflects last month’s layout is worse than no plan at all.
How Gcscontractors approaches site setup: a UK case example
Gcscontractors delivers site setup and enabling works as part of its groundworks and civil engineering services, with particular experience on projects in Cambridge and across the East of England. The work covers the full mobilisation sequence: perimeter installation, welfare setup, temporary drainage, access control, and the documentation framework required under CDM 2015.
Core site setup services Gcscontractors provides:
- Perimeter fencing and hoarding installation
- Welfare compound setup and connection to temporary utilities
- Groundworks and drainage enabling works
- Strip-out and demolition to prepare structures for new build
- Site office setup and CDM documentation support
On a recent commercial enabling works project in Cambridge, the site presented a constrained urban footprint with a public footpath running along two boundaries. Solid hoarding was specified for both boundaries to meet local authority requirements and protect pedestrians. The welfare compound was positioned at the rear of the site to keep the delivery gate clear, and temporary drainage was connected on day one to avoid welfare delays. The construction phase plan and RAMS were filed in the site office before the first subcontractor arrived. The project mobilised on programme, with no welfare or documentation findings during the principal contractor’s first audit.
Pro Tip: On constrained urban sites, treat the welfare compound as a fixed anchor point and plan everything else around it. Moving welfare mid-project is expensive and disruptive; getting it right at setup pays dividends throughout the programme.
For projects requiring site setup and enabling works, Gcscontractors can manage the full mobilisation sequence from day zero. Contact the team to discuss your project requirements.
Key takeaways
Effective site setup under CDM Regulations 2015 requires perimeter control, welfare facilities, temporary utilities, access management, and full documentation to be in place before any works begin.
| Point | Details |
|---|---|
| Perimeter first | Install fencing or hoarding before any other physical task to fix the legal boundary and orient all layout decisions. |
| Welfare is mandatory from day one | CDM 2015 requires toilets, handwash adjacent to toilets, drinking water, and a rest area before works start. |
| Documentation must be present at site office | Construction phase plan, RAMS, induction records, and the H&S law poster are required from day one and audited by HSE. |
| Sequence utilities before welfare connection | Arrange DNO power supply and water connection in advance; lead times can be several weeks and welfare cannot function without them. |
| Gcscontractors for full mobilisation | Gcscontractors manages the complete site setup sequence, from perimeter and welfare to CDM documentation and enabling groundworks. |
What experienced site managers have learnt about setup
Gate placement is the decision that site managers most often wish they had made differently. A gate positioned for convenience on day one — close to the site office, easy to reach from the road — frequently ends up blocking the primary delivery route once plant and materials begin arriving in volume. The correct approach is to walk the full delivery sequence before the gate is fixed: where will the largest vehicle enter, where will it turn, and where will it park to unload? That mental walk takes ten minutes and prevents weeks of congestion.
Welfare adjacency is the second lesson that tends to be learnt the hard way. Positioning the toilet block at the far end of the site from the handwash station is a compliance failure, but it is also a productivity problem. Workers who have to walk a significant distance to wash hands after using the toilet simply do not do it consistently. Keeping sanitation and handwash within a single compound, connected to the same drainage point, solves both the compliance and the behavioural problem simultaneously.
The third lesson concerns utility sequencing. Many site managers treat temporary power as a day-two task, assuming the site office can run on a generator for the first day. That assumption fails when the welfare unit needs an electric pump, when lighting is required for a morning start in winter, or when the DNO connection is delayed and the generator runs out of fuel. Arranging the temporary supply agreement before mobilisation, with a confirmed connection date, removes a variable that has derailed more than a few week-one programmes.
Gcscontractors: site setup and enabling works for UK construction projects
Getting site setup right from day one is the difference between a project that runs to programme and one that spends its first fortnight catching up. Gcscontractors provides site setup and enabling works for construction projects across Cambridge and the East of England, covering the full mobilisation sequence so project managers and developers do not have to coordinate multiple suppliers for fencing, welfare, drainage, and documentation.

The team handles strip-out and demolition, groundworks, drainage, and civil engineering as part of an integrated enabling works package. That means one point of contact from day zero through to the point where principal works can begin, with CDM compliance built into the process rather than bolted on afterwards. For a detailed breakdown of what the strip-out and site preparation process involves, the Gcscontractors website covers each stage with practical guidance. To discuss your project and get a clear picture of what mobilisation will involve, contact Gcscontractors directly for a no-obligation conversation.
Useful sources and further reading
The sources below were used as primary evidence in this article and are worth bookmarking for ongoing reference.
| Resource | What it covers |
|---|---|
| CDM 2015 — HSE | Full CDM Regulations 2015 guidance, including welfare, documentation, and duty holder responsibilities |
| HSE welfare on construction sites | Practical welfare requirements: toilets, handwash, rest areas, and drinking water |
| HSE health and safety law poster | Mandatory display requirements for the site office |
| HSE first aid at work | Minimum first aid provision for construction sites |
| HSE accident book | Statutory accident recording requirements |
| HSE temporary electrics on construction sites | RCD requirements, inspection regime, and safe cable management |
| HSE health and safety in construction | Comprehensive construction H&S reference covering setup, welfare, and safe working |
| Site layout plan — Designing Buildings Wiki | What to include on a site plan and how to annotate it for permits and inspections |
| Gcscontractors: site setup and enabling works | Gcscontractors service page for mobilisation and enabling works in Cambridge |
| Gcscontractors: site preparation checklist | Printable checklist for UK self-build and small commercial projects |
This article provides general guidance on UK construction site setup and is not a substitute for professional advice. Always confirm current CDM obligations and local authority requirements with a qualified principal designer or health and safety adviser for your specific project.
Recommended
- The Essential Site Preparation Checklist for Self-Build Projects in the UK (2026) – GCS Contractors Ltd
- The Site Preparation Process: A Professional How-To Guide for UK Construction – GCS Contractors Ltd
- Site preparation: 8 essential steps for compliant UK projects
- Foundation Building: The Professional Guide to Groundworks and Civil Engineering – GCS Contractors Ltd